Two years ago, when the Toys by Troy Alumi-flex lift went on the TJ, I installed a Tom Wood rear drive shaft. My old double cardan drive shaft that was originally cut for a 4″ RE lift had survived for several years on my 6″ short arm lift. However, I wasn’t putting it on a taller long arm lift….I just won’t push my luck that far. Tom put together one of his top quality rear drive shafts and got it to me quickly. It’s seen a few road trips to visit friends, two trips to Moab for the annual JeepsUnlimited Moab Run (#5 was this past spring), and countless trails and rock crawls here in Arizona. It continues to feed power to the D44 axle, existing entirely on on a diet of Mobil 1 grease (low carbs). I am very satisfied with the service it has given me.
Two years since the rear shaft was installed, it was finally time to address the front drive shaft. It was still the stock drive shaft except for a re-tube by the local drive shaft shop (which I’ll never use again!). It had took a hit doing a Martinez Canyon run with some friends and the drive home at highway speed confirmed it. In a recent conversation with Troy (Toys by Troy), we were talking about some front drive shaft vibes he had seen on a few new installs. It seems that the spline engagement on the slip yoke was minimal and resulted in highway speed vibes. Although I run the Warn hubs up front and do not worry about a rotating drive shaft on the highway, I still thought it wise to get a longer drive shaft as an engagement problem could show up on the trail too.
I got in touch with Tom at Tom Wood’s Custom Drive Shaft. It was a pretty painless process…..get Tom the necessary length measurement, give him a day or two to build the drive shaft, and then wait by the door for it to be delivered. That was my plan and I was sticking to it….and it worked! I got him the numbers about noon on Monday and the UPS driver was ringing my door bell late Friday afternoon. I hadn’t opened the package and I was already satisfied.
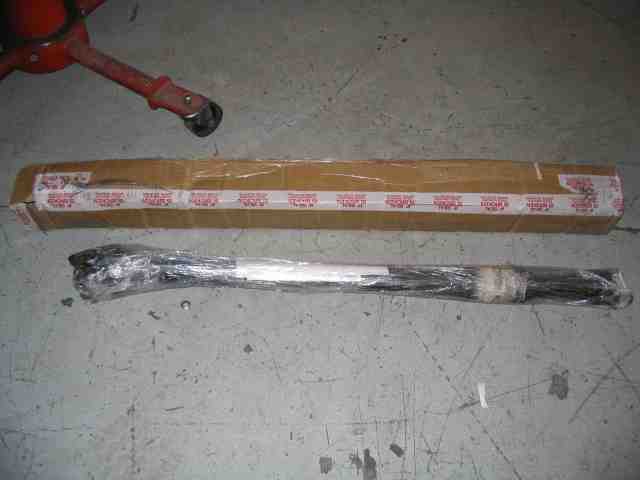
But the package didn’t stay unopened very long. Out came one drive shaft with associated paperwork, wrapped in that plastic pallet wrap film (I’m sure there is a name for it but that’s what I call it). Nice touch….keeps any of the excess lube from soaking through the shipping box. Now in my garage, that would not be much of an issue….sitting in the living room on the carpet….yeah, my wife would mind.
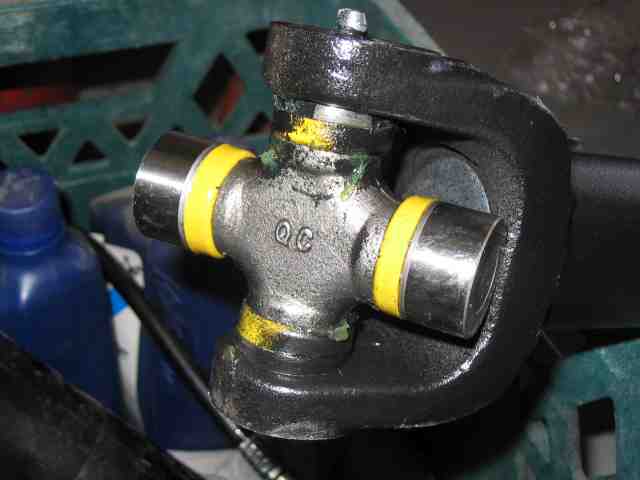
The drive shaft is built with Tom’s Gold Seal universal joints. I’ve not followed this joint very closely but I know that it’s been available for a couple of years now. I’ll be reporting back here from time to time as to how the joints hold up. Based on the info at Tom’s site, I expect them to last quite a while.
I also noticed that these drive shaft uses a forged steel yoke. I asked Tom about this and he stated that some of the shops building drive shafts use ductile cast yokes. Forged sounds like a lot better idea to me. The last thing I want to do on the trail is deal with a broken driveshaft. Wrenchin’ is done at home, the trail is for wheelin’.
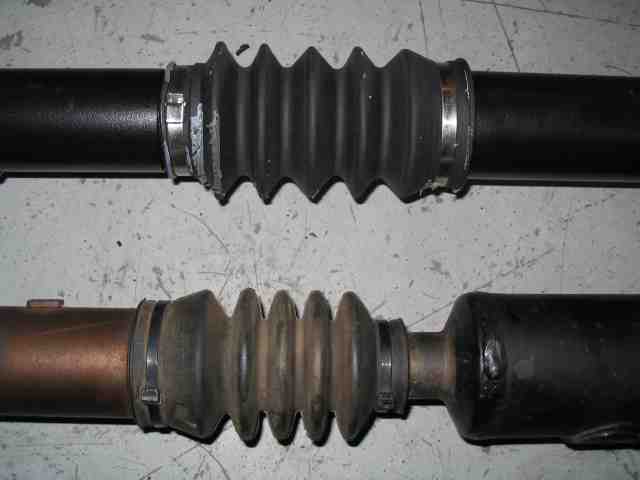
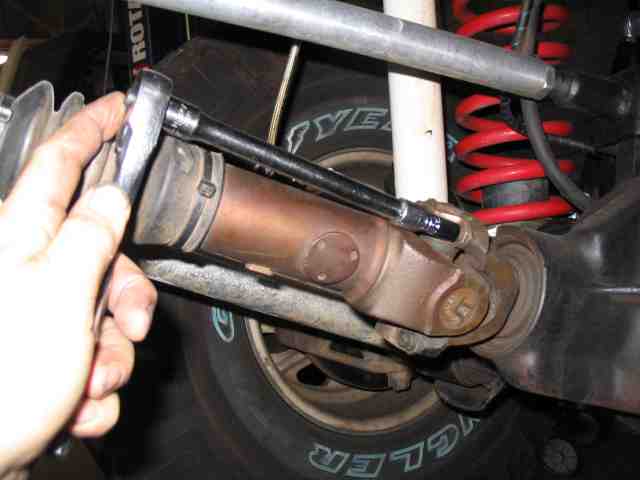
My old drive shaft is in the lower half of the above pic. From the last re-tube, you can see the black tie-wraps holding on the slip yoke boot. I had already replaced the plastic straps twice. I was glad to see metal straps on my new shaft. To say the paint job was a level better in quality would not be doing it justice. My re-tubed shaft was rattle canned by the folks that did the work. Yeah, I know it is going to get scrubbed some by the rocks on the trail and such but I still like to start out with a nice paint job. Tom’s looked first rate. See that nice weld blob on my old shaft? I gave Tom’s a good going over and the welds looked great.
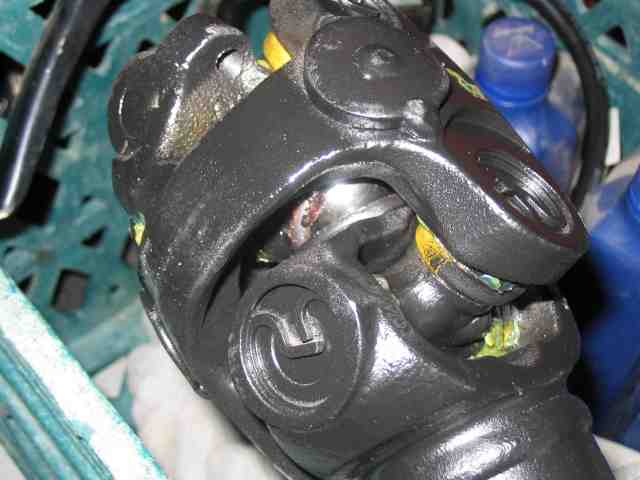
Tom balances each shaft before it is prepped for paint. You can see a balancing weight welded in place in the above pic. The run out tolerances on the tube are kept to a maximum of .004″. This ensures a smooth spinning drive shaft on the highway, an important factor for those folks running stock unit bearings in their TJ.
OK….now that you know a bit about the new drive shaft, it’s time to get it installed.
I cheated this time. I used a hydraluic lift to bring Lady up to working height. Hey, I had an excuse. It’s been over 110 degrees out here for the past couple of weeks and now the humidity (summer monsoon season) has started. If I didn’t have to lay on my back in the middle of my driveway to work on this, I wasn’t going to. Troy (Toys by Troy) was nice enough to provide me with some lift space for a bit while I worked on this project. Many thanks!
I should mention that if you have the stock transfer case skid, you do not need to remove it in order to disconnect the drive shaft at the transfer case. I have another write-up that details removing the drive shaft in this manner. I was also due to change the transfer case fluid. Draining the fluid can get a little messy with the skid in place so I thought I would take advantage of the situation and do a fluid change at the same time.
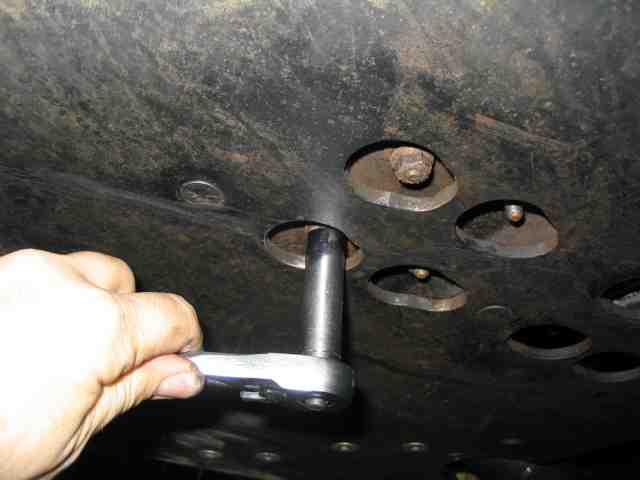
With a ratchet in hand, remove the four nuts that secure the tranny mount to the skid plate. They can be reached through the access holes in the skid. Your belly plate may look a bit different than this one, but you’ll still most likely have four nuts to remove to separate the mount from the skid.
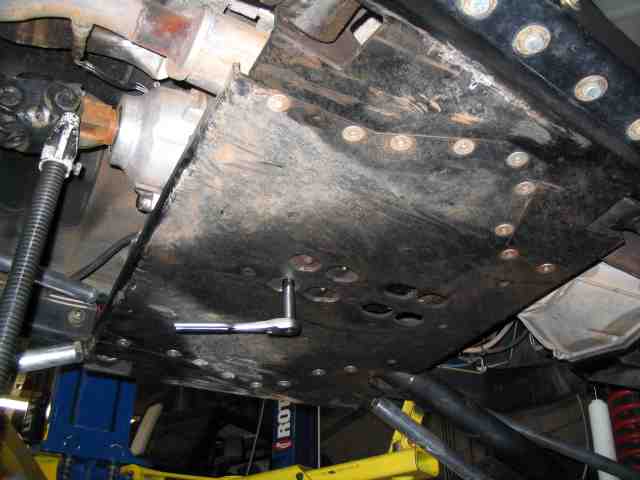
With the tranny mount nuts removed, I slipped a screw jack under the output shaft of the transfer case. (and pretend I didn’t leave the ratchet hanging on that last nut) I put just a bit of tension on the jack which causes the tranny and t-case to lift a small amount off of the skid plate….a small amount, like an 1/8″ or there about. You don’t need more than that. If you are doing this in the driveway, you can use a bottle jack or a floor jack to support the drive train.
I ran in to one snag as I was removing the 18 counter sunk bolts that hold the removable section of the skid plate in place…..four of the allen head bolts stripped out….or I should say that the head stripped out and the bit just spun around in it.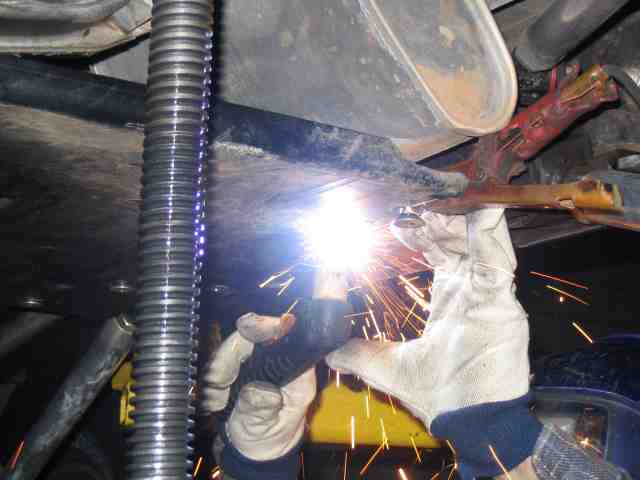
Nate was working in the shop and when he noticed that something was wrong, he came over to offer a hand. He explained to me that he had pretty good success using the plasma cutter to remove the center of the bolt. After the bolt was burned through, a drift punch or something similar could be used to knock out the burned out shell. What the heck, I had four bolts that simply were not coming out.
We hooked up the plasma cutter and Nate burned the first one. He didn’t go clear through to the end of the bolt. After about half the bolt was burned out, a hammer and cold chisel was used on the bolt head to turn it. It broke lose with surprising ease, in my opinion. We both agreed that the intense heat also helped break the corrosion holding the bolt in place. The remaining three bolts were burned and successfully removed. I chased the threads of all of the holes with a new bolt to ensure no threads had been damaged. No reason to unknowingly set myself up for another round like this when it comes time to remove the bolts again.
With the drive train supported and the skid plate removed, I removed the 4 bolts that hold the two u-joint straps at the D30’s yoke. You may want leave the straps loosely attached or support the end of the shaft if you are on a lift. Having it fall out of the yoke while you work on the other end is not a good thing to have happen.

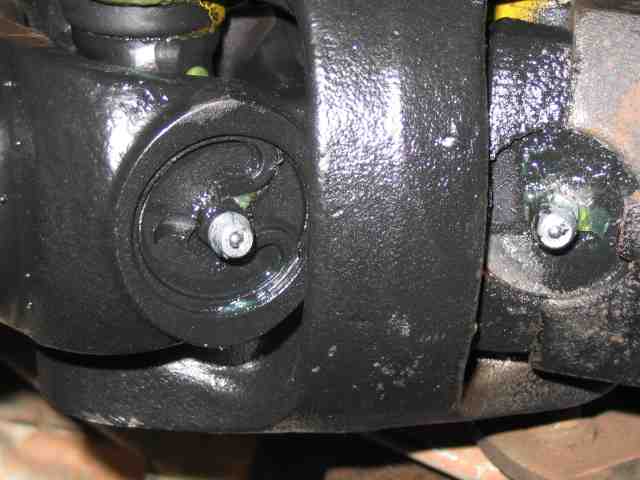
The two arrows in the above pic point to two of the four bolts that you need to remove at the output yoke of the t-case. With the front wheels off the ground, you can remove two of the bolts and then rotate the drive shaft to expose gain access to the remaining two bolts.
With all four t-case yoke bolts removed, I carefully pulled the drive shaft off of the t-case yoke axle yokes. I cleaned up the surfaces on the yokes before installing the new drive shaft.
For those that use the torque specs during these tasks, the front u-joint straps are tightened to 14 ft. lbs. The four bolts at the t-case yoke are torqued to 20 ft. lbs.
With the drive shaft in position, I did a drain on the t-case fluid followed by a refill. With out the skid in the way, it was a quick and easy job.
With no more maintenance to do, the skid plate was put back in place. If you are doing this in the driveway by yourself, a floor jack will make that task very simple while you thread the bolts into the holes. As for me, I broke out the container of anti-seize and coated the threads on the bolts going back into the skid plate. I really didn’t want a repeat performance with the plasma cutter again.
That’s it…..certainly a job that most anyone can do in the comfort of their buddy’s shop or at the worse, on their back in the driveway. (hey, I did both of my first short arm lifts on my back in the driveway)
I look forward to many years of service from Mr. Wood’s drive shaft. You can’t go wrong getting your next one from Tom.