After having helped BobP install his JK hood lift kit, it was time to do the tail gate prop on my TJ. Jim Piatt, of hoodlift.com, has been busy putting these oil and nitrogen gas filled struts to good use. I first got to know Jim a bit back in 2002 when I installed his TJ hood lift kit. It’s been working great ever since. With that kind of track record, I have high hopes for his kit that holds open the TJ’s tail gate. No more having it slam shut when you are parked on an off-camber trail and stop to get something out of the back of the vehicle. Having just helped Bob with his install, I was pretty sure I could handle this one….heck, it was basically half of a hood lift kit.
The tail gate prop kit arrived in a couple of days with everything safe and sound. There isn’t much to it….a hardware package containing the mounting brackets, screws, and a drill bit (nice!)…..the gas strut itself…..and some well written install instructions. If you are just getting into doing some mods on your TJ and you are a little worried (hey, we were all there at some point in time), a project like this works great to build confidence while providing you with a useful mod on your Jeep.
Let me get started by saying that this install ended up being one of those that I’ve mentioned in other write-ups where a prior mod causes some slight changes to be made in the mod now going in. Years ago, I had a tire carrier that used an internal reinforcement bracket. When the carrier was removed, I left the bracket in place mostly because I had to remove other “stuff” in order to get it out and it really wasn’t hurting anything being where it was. So….with this tail gate prop mod, the tire carrier bracket had to be dealt with.

The 5/16″ bolt circled above was near the spot where one of gas strut mounting brackets was to be located. (The install document has some good photos and measurements to help you properly position your mounting brackets.) I had enough room to locate the new bracket between that bolt and the rear of the vehicle….but…..I wasn’t going to be using the screws supplied with the Jim’s kit. The old tire carrier bracket was about 3/16″ thick and I wasn’t going to try and put the self tapping screws through that stuff. Time to improvise a little.
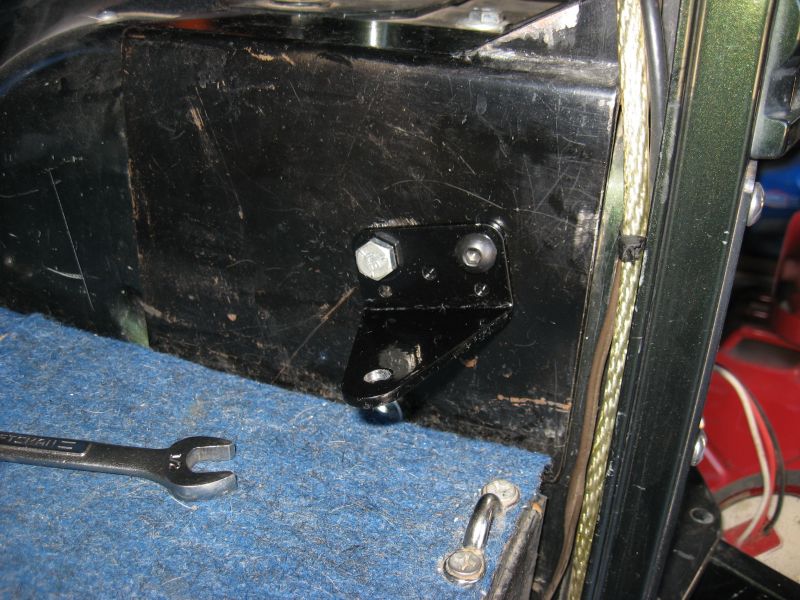
With my drill motor and bench vise, I enlarged one of the mounting holes in the new bracket to take the 5/16″ bolt. At the same time, I opened up another mounting hole to handle another 5/16″ bolt. I had a button head bolt sitting in the bolt drawer and so I used it. Now….don’t ask me why I didn’t grab two of them so they both looked the same. It wasn’t until I was sitting here at my computer desk, resizing the photos, when I noticed that really does look a little stupid. Oh well…..the next time I’m wrenching back there, I’ll change it out and then I’ll have a matching pair.
If you are wondering why I can’t drill a new hole and get the bracket level, let me say that it is not supposed to be level. Jim had some good info in his install document (yes, imagine that….I really did read it!) which explains that the seal on the gas strut must stay oiled (from the oil in the strut) so that it doesn’t dry out and start leaking. To do this, you have to mount the strut so that the big end is higher than the small end. (you’ll see this in another photo or two) So…mounting the bracket at an angle simply keeps everything lined up and eliminates the possibility of binding at the strut mounting ball. Kind of funny when you think of it….we worry about rod ends binding up front on our steering….for the same reasons…..misalignment caused by suspension flex.
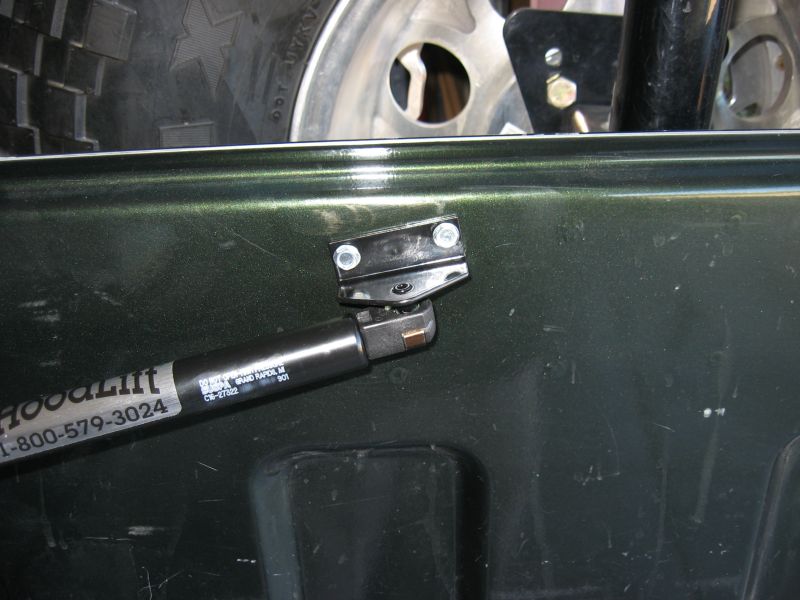
With the first mounting bracket finished, I attached the the ball stud to the mounting bracket and “snapped on” the small end of the gas strut. I attached the other mounting bracket to the big end of the gas strut and used it as a drilling template after checking the install docs. Again, Jim provided good measurements and photos to ensure this bracket would be positioned properly too. I grabbed my drill motor (with the supplied bit from the kit) and started on making two more holes.

Using two star washers and the self tapping screws from the kit, the second mounting bracket was attached to the inside of the tail gate. Again, I’ll mention that you should note the applicable steps in the kit’s installation docs. Also….note that this bracket is also mounted at an angle. See what I mean….the big picture is all coming together now, isn’t it? Looks pretty good from here.
Here is the finished tail gate prop, officially installed with only a slight modification to one of the mounting brackets. That’s how we mod Jeeps, right? Evaluate, adapt, and overcome. <grin>
Following in the tradition of the other related gas strut powered write-ups, here is a video demonstrating how the TJ tail gate prop operates. As you can see, it opens the trail gate quickly but yet dampens the movement right at the very end. No pops, no bumps, no bangs, and no slams. Simply put, it works just like it is suppose to.
Check out Jim Piatt’s web site for other Jeep related products. Jim’s back yard is pretty darn close to the Rubicon Trail. If you are in the market for a hood lift or tail gate prop, you won’t find a better quality product than what Jim sells. A lot of his stuff has been knocked off with cheap components and sold with 90 day guarantees. Jim guarantees his kits for life……enough said!