Note: Toys by Troy shut down their operation at the end of 2007. Instead of removing this write-up, I am leaving it on the web site for a couple of reasons. The steps for installing it are pretty much the same as one from another manufacturer and so you’ll get an idea of what is involved if you decide to do this type of modification. If you happen to come across one on the used market, you’ll have some information about it that can help you do the installation correctly.
I had been running a rear bumper that I got long ago (before I even started the web site) from the local 4×4 shop. It was nothing fancy but I will say that it has withstood the last four years of rear bumper abuse very well. It has been drug across some of the best trails here in Arizona and has managed 5 trips to Moab and a run over the Rubicon. Aside from the lack of powder coating on the bottom corners, it still looks pretty good. None the less, I decided it was time for the bumper to go and with it, the Canyon City tire carrier. The carrier was originally bought with the idea of carrying a pair of jerry cans for extended 4x4ing trips. As it turned out, the extended trips needing gas was replaced with excursions to Moab where gas stations are within easy access of the trails. We used them on the Rubicon Trail but it was not a necessity as we all finished with ample gas in the vehicle tanks. So…why keep the spare tire sitting that far back? Just so it can leverage the vehicle and cause the front end to get lighter when climbing up an obstacle? I think not….time to go as well.
With the decision made, it was now just a matter of getting the bumper/tire carrier replacement and get it mounted. Since I was running a Toys-by-Troy front bumper, I saw no reason to pass up the chance to try his rear bumper/tire carrier combo. I spoke with Troy and stopped by his shop to pick it up. There was some open floor space in the fab shop so I decided to install it there. Besides, wrenching there is more fun than doing it alone in the driveway at home.
Taking the old bumper off was just a matter of removing the 10 nuts that held it onto the rear crossmember and the frame. Most aftermarket bumpers use a few more bolts than the factory bumper (or at least my factory bumper). I had already drilled the extra 4 holes in the crossmember for my old bumper and I noticed that the TBT bumper used the same extra holes….ahhh….one step I could skip!
Before you ask why the bumper looks a bit dirty, I neglected to take a couple of pictures during the install and so I snapped them after the bumper had spent a day out in the desert.
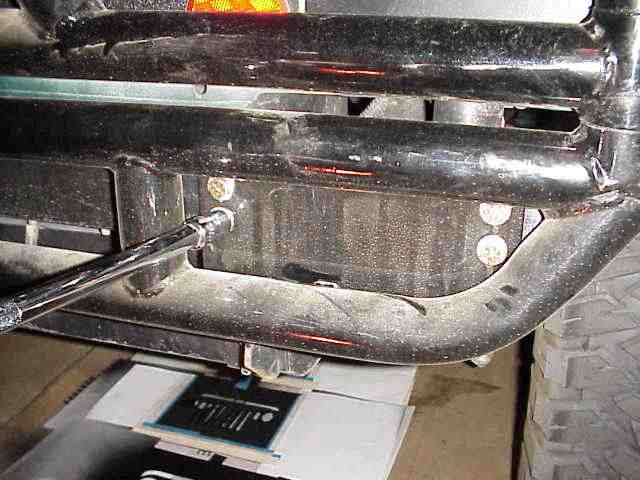
In this picture, you can see the 4 holes at each end of the bumper. I have a socket on one of the two inner bolts that you will need holes drilled in the cross member. Likewise, the corresponding two bolts at the other end of the bumper will requires a pair of holes there too.
I mentioned that I enjoy wreching with friends and doing so at Troy’s shop comes with some extra benefits too….access to a tool or two that I certainly won’t have in my own toolbox.
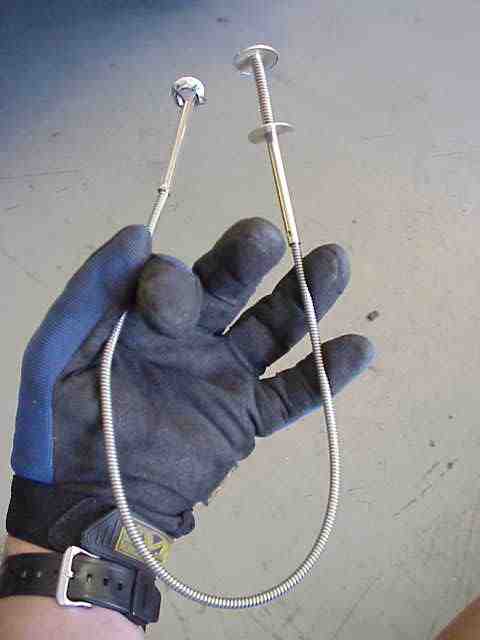
Having fought with my old bumper when installing it, I wasn’t looking forward to doing the same with this one. Mike, one of Troy’s techs, showed me where they kept the “use this to get the nuts in position when you install the bumper” tool. Nothing fancy….just one of those mechanical pincher things that are worth there weight in gold during a install like this.

Troy supplies flange nuts in the mounting hardware package and they worth great on the end of that little grabber tool. With the nut firmly held in place, you can easily locate it directly behind the hole in the bumper and thread the bolt into place. With these type of nuts, there is no need to use a wrench on them….they will bite into the metal as you tighten them down and will not slip. I used a 3/8″ impact wrench to spin them quickly into place and then hand tightened them with a regular ratchet. Worked great and I had those hard to reach bolts on in no time at all.
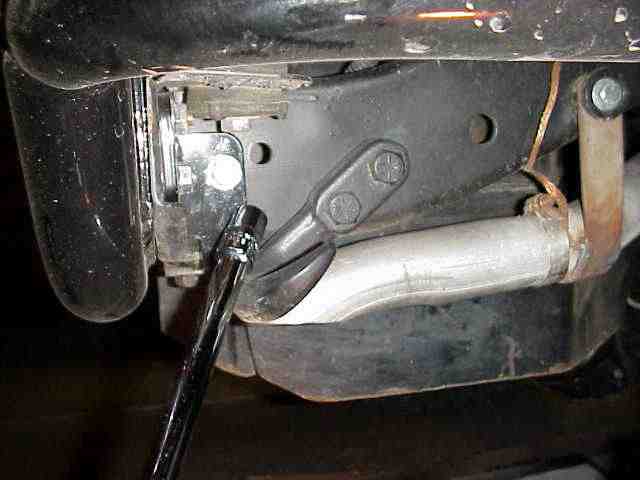
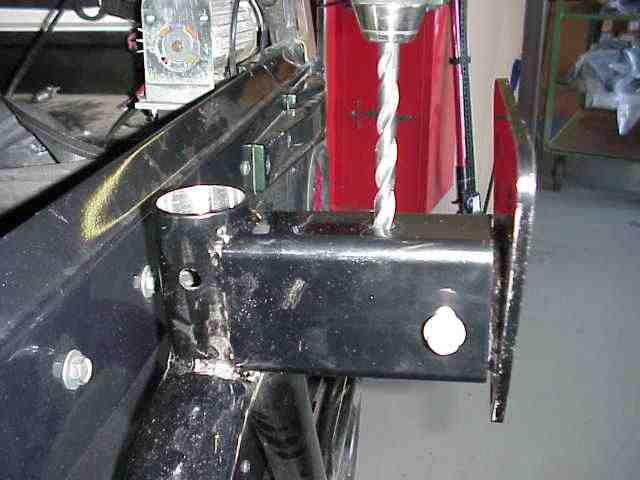
You will also need to drill a hole on the side of the frame and use one of the self tapping bolts to help secure the mounting bracket in place. Replace the bolts in the bottom of the frame and you basically have the bumper part of this project installed.
Toys by Troy Rear Bumper
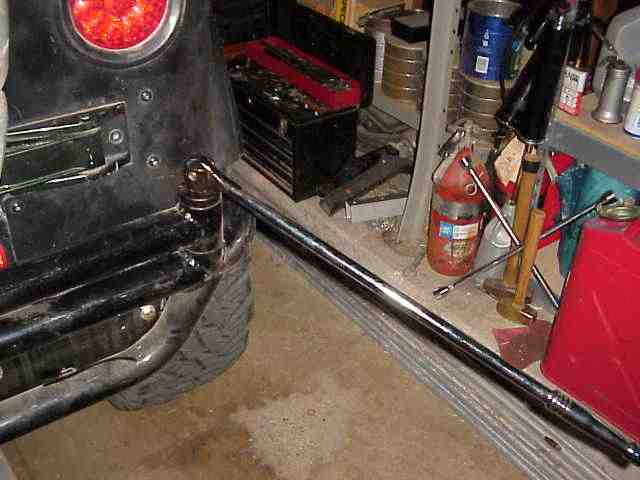
With the bumper in place, the tire carrier is slipped into position and the screw in hinge pin is torqued into position. I used a 2′ break bar to put the lean on the hinge pin. Don’t forget to screw the grease fitting into place on the hinge.
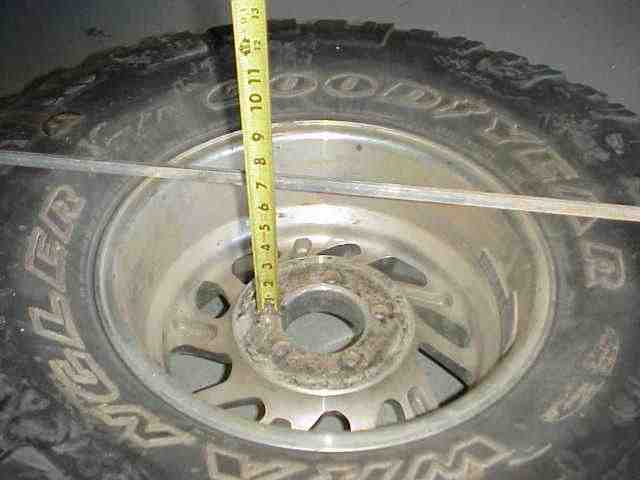
Lay a flat bar or piece of straight wood across the back side of your spare tire and then measure the depth from the under side of the bar to the mounting surface of your wheel. This measurement will be used to properly position the tire mounting plate in the tire carrier arm. With the mounting plate properly positioned in the carrier arm, set the depth of the carrier plate to be about 1/2″ less than what you measure on the tire. This will allow just a little bit of compression of the tire sidewall when you snug down the lug nuts. Center punch the mounting holes on both side of the mounting plate insert.
Drill the two mounting holes in the sides of the mounting plate. Once the holes are drilled, screw the 3 tire stud bolts into the mounting plate. The plate will accommodate both 5 on 4.5″ and 5 on 5.5″ wheel patterns.
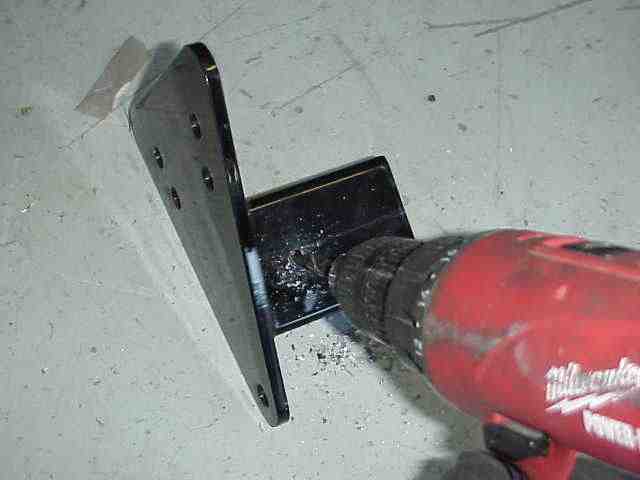
Slide the mounting plate into the tire carrier arm. Screw the self tapping bolts into the mounting arm. With my 3.5″ backspaced rims, I was not able to compress tire against the tire carrier support arms. I could trim a bit off the end of the tire carrier arm but opted not do go that route (at least not yet anyway). Troy suggested I drill a 3rd mounting hole into the top of the mounting arm to help stabilize everything. So I drilled a hole as shown above and put in another self tapping bolt.
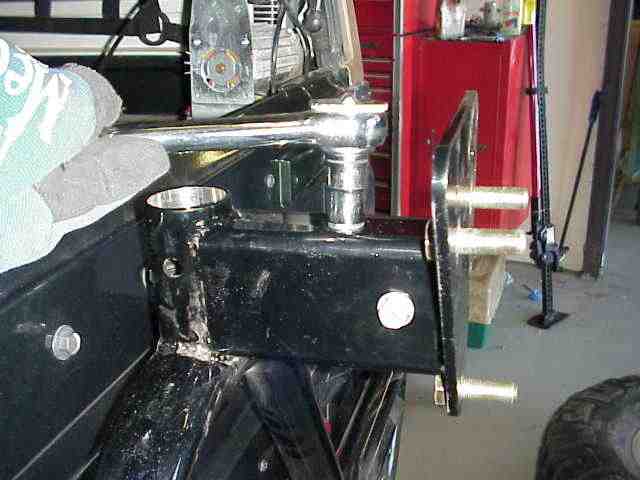
With the tire mounting studs in screwed into place, I tightened up the top mounting bolt. I think it will work just fine. If not, I’ll Sawsall an inch off the arm so the tire mounting plate will fit closer and put the tire up against the tire carrier support arms.
Toys by Troy Rear Bumper
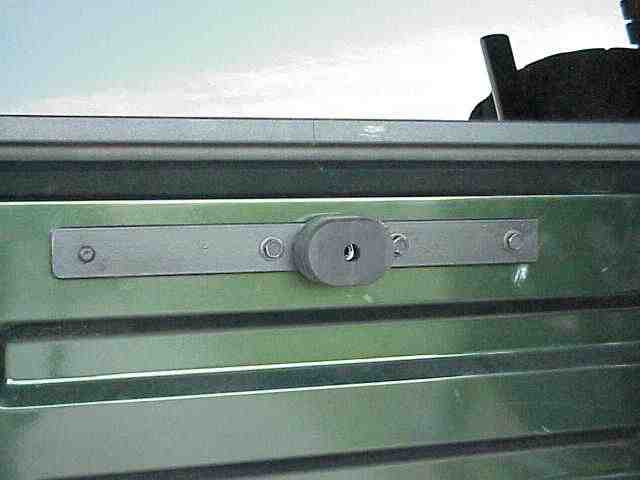
It is recommended that a bump stop be used between the tail gate and the tire carrier. Some folks attach one of the old tire carrier bump stops to the back of the tire carrier. I opted to do what a friend of mine had done. We took a piece of 3/16″ flat strap and drilled holes in it to line up with 4 of the holes in the tail gate. One of the old bump stops was made a bit thinner with the help of an angle grinder and a 60 grit sanding disc. I trimed it down until it was thick enough to cause some pressure to be created when the tire carrier latch was secured. Black RTV was used to secure the bump stop into position on the metal strap. With this installed, it keeps the tire carrier snugged up against the tail gate. The ride home from my buddy’s place had no sound coming from the tire carrier.
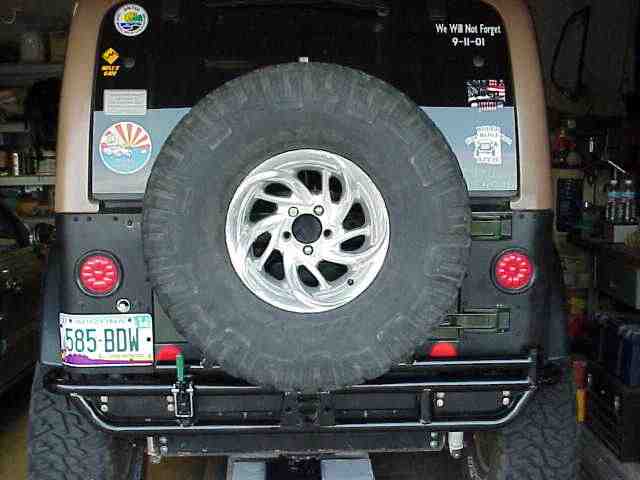
With everything done, I took a picture of the bumper and tire carrier. Between the corner panel protectors and bumper design that has it wrap forward under the rear corner panels, everything is pretty well protected on the back corners.
The next part of this project will be the installation of a couple of inexpensive lights. A $20 pair of driving lights, controlled by a power relay and triggered by the back light circuit from the transmission will serve as backup lights. With an extra switch to function as an override, the backup lights can be turned on without the transmission being in reverse.