Compared to the vehicles I grew up with, the amount of ignition maintenance that is required on today’s vehicles is almost non-existent in comparison to the engines from the 1960’s. Setting the points, making sure the condenser was good, and chalking up the timing marks so you could see them in the timing light was a very common weekend task. With today’s engine computer mostly running the show, we are mostly left with throwing in some spark plugs every now and then and maybe even a rotor cap with wires once in a while. I don’t remember when I last used a timing light….oh well, engine computers are our friends (just keep telling yourself that).
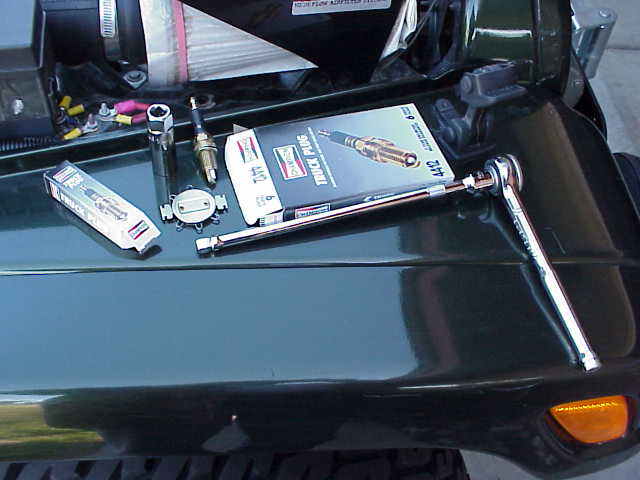
The items required for a typical spark plug change are pretty straight forward. You’ll need a 6 pack of new spark plugs (or a 4 pack for you cylinder challenged owners), a 5/8″ spark plug socket, a 3/8″ ratchet and extension, and a wire feeler gauge.
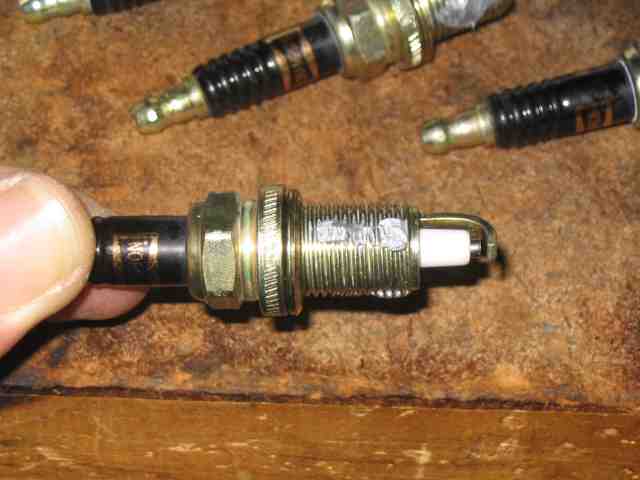
I used to use the Champion 4412 truck plug but they stopped making it. A good plug available now, for the 4.0L engine, is the Champion 3034. They cost a bit more but will last longer.
If you have the newer 4.0L engine without a distributor, they can be picky as to what plug they prefer. There are several good plugs for your coil-pack engine which include the Autolite APP985 and Champion 7034 (both are double-tipped platinums) or Autolite XP985 (Iridium). Avoid installing any single-tipped platinum plugs if your TJ has coil-packs in its ignition system.
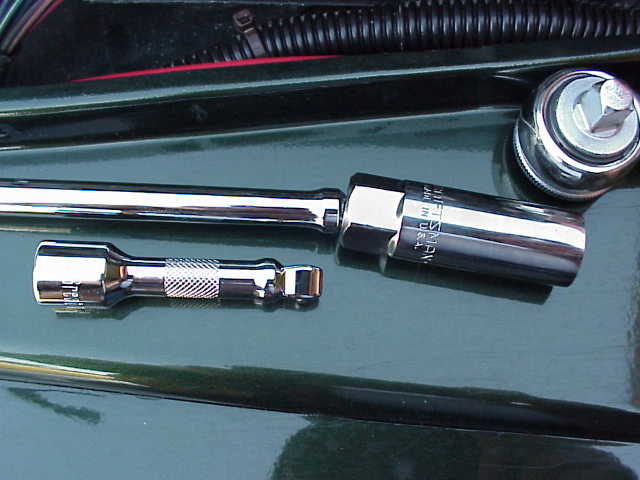
One thing you might find handy for this project, and for just about any other one for that matter, is a set of “wobble” extensions for your ratchet. I used one about 12″ long for all of the spark plugs except the one in the back cylinder (against the fire wall). That one got the 6″ version. The “wobble” extension allows the socket to wobble back and forth a bit, as can be seen in the above photo….note how the socket and extension are not aligned with each other. By doing this, it eliminates the requirement of having everything lined up nice and straight. This can be a blessing in a cramped engine compartment where you can’t always get a straight on shot at the spark plug.
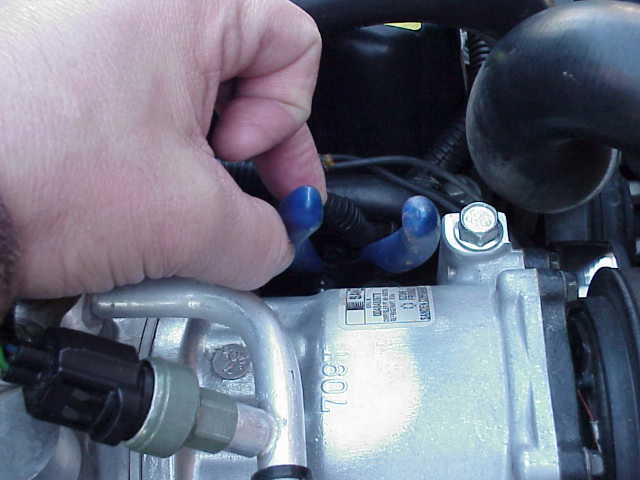
The one thing I have constantly been told, ever since buying my TJ, is that it is nearly impossible to get the #1 plug wire off of the spark plug (assuming you have an A/C compressor under the hood). I was ready for this one, having heard horror stories about peeled knuckles, bloody fingers, and even worse things happening to those who braved ol’ #1. Well, I’m here to tell you that a medium sized pair of common pliers, carefully grasping the spark plug boot, will remove it in about 5 seconds with minimal effort. I’m still not sure what all the hoo-haa is about, but I sure spanked that boot, no doubt about it!
There you go….living proof that it can be done with just a simple pair of pliers. Since you can’t see the back of my hand, you’ll have to trust me when I say that the skin on my knuckles are still intact.
Spark Plug Maintenance
With the plug wire removed, the socket is slipped carefully over the plug and the plug is removed. This is probably a good spot to mention that it is wise to keep all of the plug wires on their respective spark plug except for the one you are working on. There is nothing to be gained by pulling all of the wires off at once, other than the possibility of getting them mixed up when you try to put them back on.
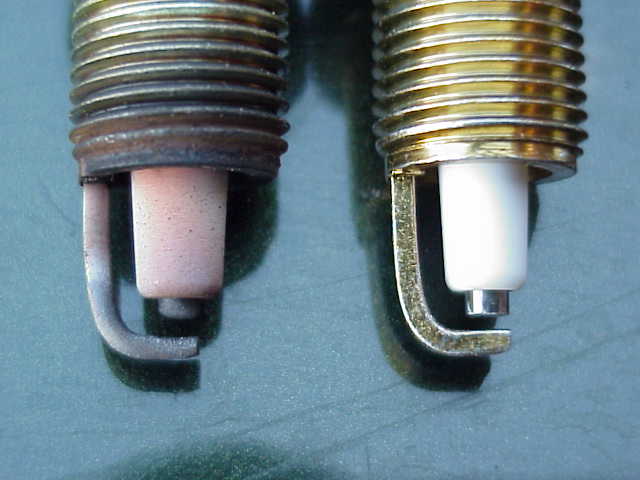
OK…so you have the old plug removed. I put an old and new one side by side just to see if I could see much of a difference. Can you? The electrode gap on the old plug is visually wider than the new plug (which was properly gapped before this picture was taken). The old plug comes in at about .050″ The color and deposits on the white insulator look pretty average. There is no sooty deposit, no oil residue, etc., which means the engine is still in good condition. (I should hope so, it just turned 40K miles today).
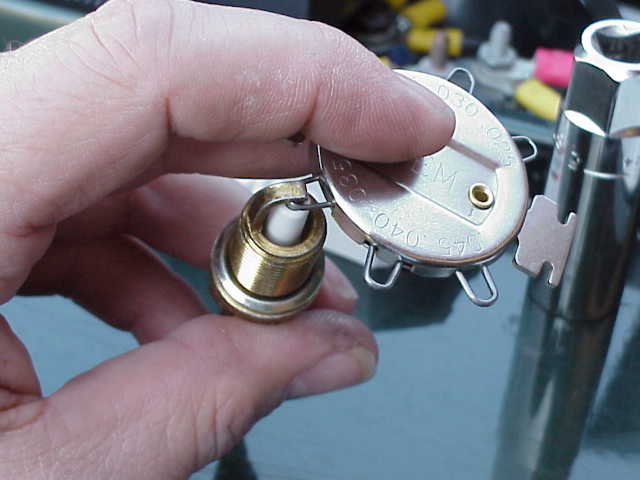
Speaking of electrode gap, don’t forget to set the gap before you install the plugs. If you don’t have one, you should spend a couple of bucks and get a wire gapping tool made just for spark plugs. OK…so most people don’t set the gap one handed, as I am doing here [insert big grin], but I was busy taking the picture with the other hand. My TJ requires the plugs to be set at .035″. The tool is handy since it allows you to easily bend the ground electrode (the one attached to the threaded body of the plug) to the exact position in order to get the proper gap.
I got an e-mail from a site user that recently changed plugs on his 2.4L SE TJ. It has an aluminum head and he mentioned that anti-seize is a must and that torque specs is just 15 ft. pounds, which is about half of the 4.0L specs. The gap on for the plug is a little different too, being .040″.
I also like to add a little bit of anti-seize compound to the plug threads. It doesn’t happen very often, but more than one or two spark plugs have been broken in half while trying to extract them from the engine. The way I see it, the incremental cost of putting a dab of anti-seize on the plug is probably 10 cents for the project. A little goes a long way with this stuff so don’t over do it.
After you have set the gap, slip the spark plug into the spark plug socket and carefully thread it into the block. Do this by hand until the plug has fully seated in order to make sure you are not cross threading the cylinder block hole. Torque the spark plug between 26 and 30 ft. pounds. Firmly attach the spark plug boot to the top of the plug and you are ready to go. One down and 5 (or 3) to go.
Note: I clipped this snip-it of info from an on-line Jeep forum. Hopefully it will be helpful to someone….
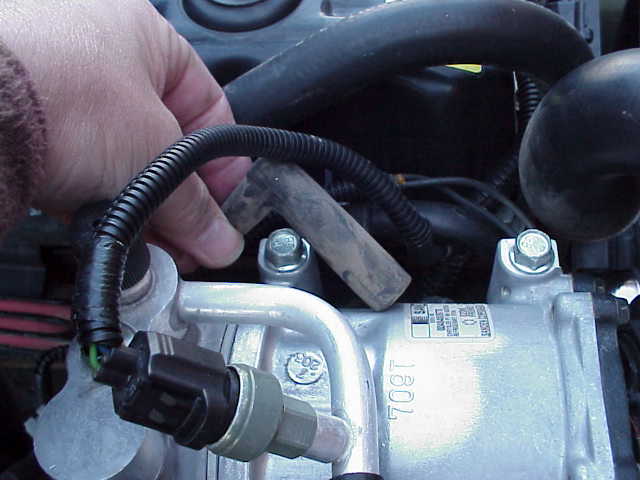
A friend of mine was changing plugs the other day and noticed his heater hose was laying on the plug/coil pack cover and had a significantly worn spot in the hose back by the bend above #6. His is an ’02 sport with 50K and the engine – body relationship has not been changed at all. He told me to check mine so I did.
Mine is an ’03 with 38K and it had the same problem only worse. Mine has worked a deep hole into the hose and can’t be far from going through the hose. Not a hard or expensive fix but something to look at. In all fairness, mine has a body lift and matching motor mount lift along with a 1″ drop flat skid. I’m sure the flat skid has a lot to do with mine being worse.
I just know it would suck to spring a pinhole leak on a road trip at road speed and not notice till you smoked the engine.