Note: Toys by Troy shut down their operation at the end of 2007. Instead of removing this write-up, I am leaving it on the web site for a couple of reasons. The steps for installing it are pretty much the same as one from another manufacturer and so you’ll get an idea of what is involved if you decide to do this type of modification. If you happen to come across one on the used market, you’ll have some information about it that can help you do the installation correctly.
Everyone needs a little more protection every now and then….and with my upcoming 2002 Thanksgiving run to Johnson Valley, I figured now was as good a time as any to get some more protection.
These came from Toys-by-Troy, a local 4×4 shop that we have here in the Phoenix area. I spent some time at Troy’s shop while we carefully tested the fit of these new guards. I was the first install off of the initial production run. Troy was VERY interested to see just how well these fit. They are laser cut and he took the original measurements off of his TJ. The fitting on my TJ and several others will determine the final layout of all of the laser cut holes. As we are finding out, not all TJs are built the same (but you already knew that, right?) For example, my Sahara flares are about a quarter inch longer than the Sport flares (we already knew they were wider but that does not matter for fitting the corner guards). Note that in some of these pictures, I have not dressed off the flares. (I put one bolt in them so I could drive home and get these pictures taken before it was dark out.)
Note: Since the initial pics and write-up, I was finally able to get some time to apply some paint and get them bolted back on. I spent a day at ScottK’s place, changing diff fluid, taking the corner guards on and off, etc. I have included some more pics that were taken today while doing the painting. So, this write-up is a mish-mash of pics taken at Troy’s facility and today’s painting session. Since the installation of these rocker guards, TBT has changed the design a bit, increased the thickness, etc.
I am VERY happy with the fit of these guards. The fit around the bend radius is better than any of I have seen to date.
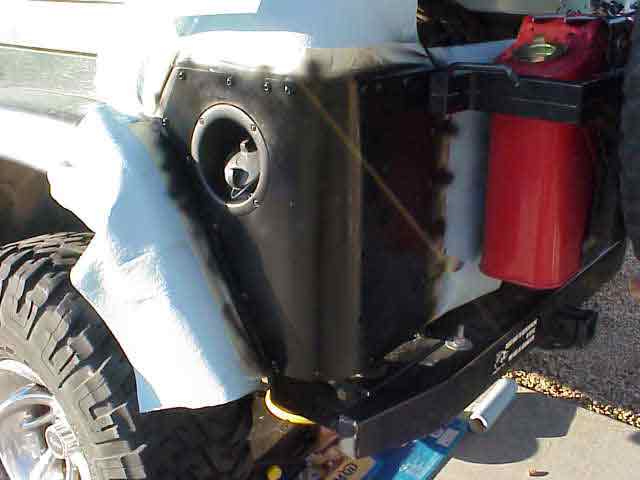
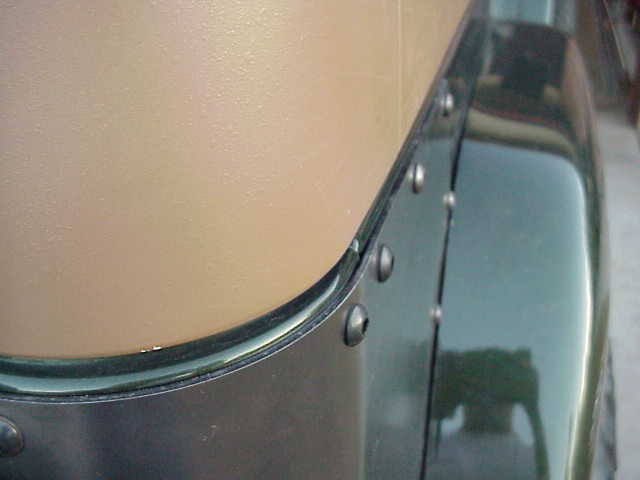 This picture was taken at Troy’s place. We had just finished bolting the right guard on and we took a few pics to see just how it looked, the nice tight fit, etc.
 Here is another picture of the passenger side.
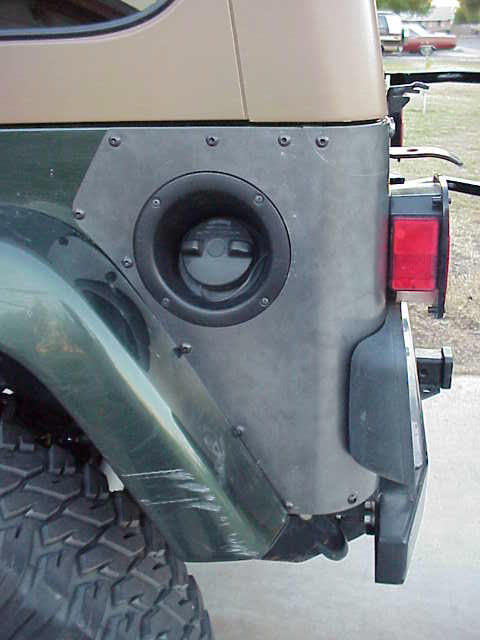 The driver’s side gave me a little trouble, although it was pretty easy to take care of. We found that DC isn’t very exact as to where they attach the gas filling insert. Troy took the original measurements off of his TJ. We then discovered that mine was mounted just a bit forward of where his was (about an 1/8″ or so). Troy decided to enlarge the hole a bit more to accommodate the somewhat random placement done at the factory. If it doesn’t line up for you, do what I did…..unscrew the 4 sheet metal fasteners that hold it in place and move it around until it fits in the corner guard….then re-drill what ever hole(s) you need.
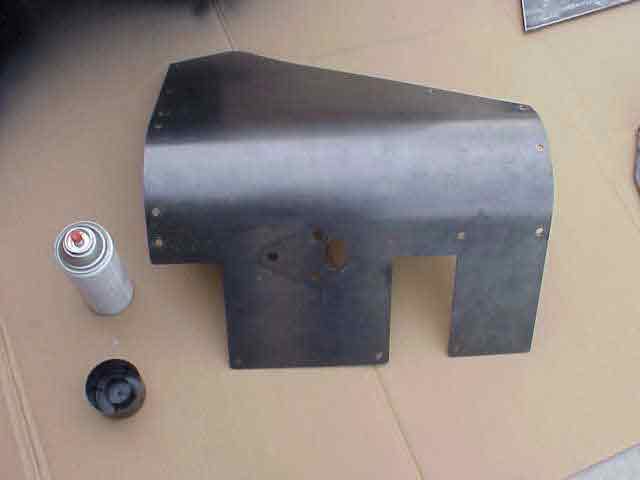 With the run to Johnson Valley finished, I pulled the guards off and hit them with some steel wool. I ran into some rain on the way from California so there was some light surface rust in a few places. It took all of 2 minutes to knock that week old rust out of the way. We pulled out some old cardboard and I got out my Rustoleum rattle can and went to town.
 I applied several coats to the under side of the guard and let it dry for as long as I could. We had some afternoon sun that helped speed up the process. At that point, I started bolting the guard back on to the Jeep. I also wanted to spray the fasteners once they were in place. Scott’s wife helped with the taping (she didn’t really want me to paint the TJ black) and in no time, we had enough in place to prevent me from making too bad of a mistake.
After the paint dried, I bolted the lights and such back in place and we called it a day.
I’ll be doing LED tail lights in a bit so stay tuned as the corner guards take on a new look (gotta do something during Christmas vacation, right?)
Toys by Troy Rocker Guards
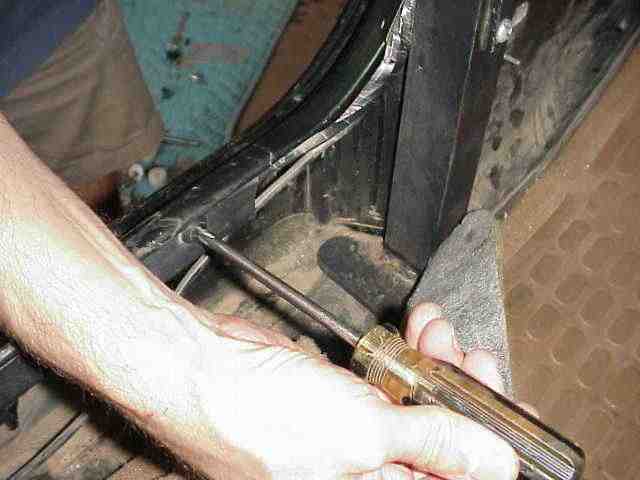 While the install instructions for Troy’s guards are but a single page, be sure to read through them and note the comment about your electrical cable bundle that runs along the top of the rocker on the driver’s side. Remove the plastic retainers (we finally ended up pulling them out with the pliers and used zip ties to put them back) so that you may temporarily move the cable bundle while you drill the necessary mounting holes. The passenger side as no cable bundle to worry about. Now would be a good time to say that you should always verify what lies behind the sheet metal as you drill holes in your Jeep. Drilling into a cable, hose, or fluid tubing is not a fun thing to have happen. It only takes a couple of seconds to double check!
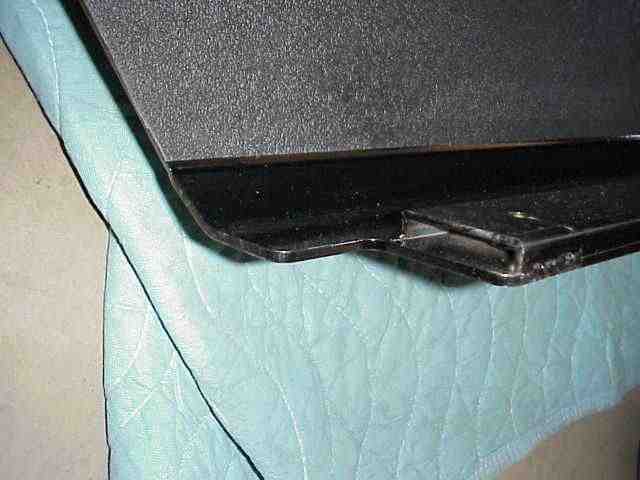 Fitting the rocker flush to the bottom of the tub is always a problem since that part of the tub is recessed about an inch or so. Sun used a pair of nylon spacers to fill this gap. Troy’s rockers have a section of metal welded on to the guard to fill this tub gap. I like this approach better since it disperses any rocker guard impact over a much larger portion of the tub’s bottom.
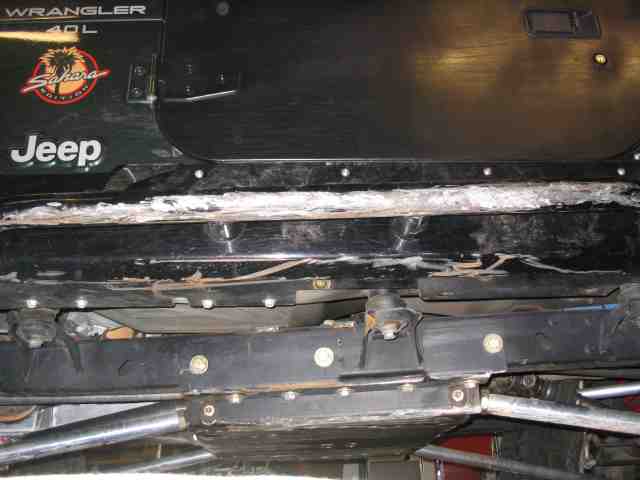
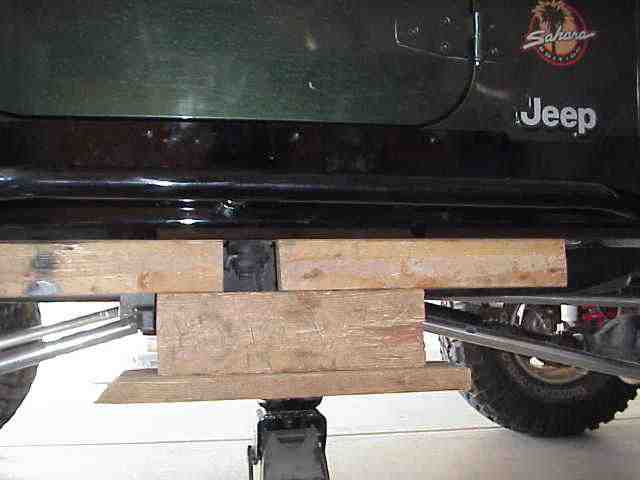 With the help of Mike’s floor jack and a variety of wood blocks, we placed the passenger side rocker in position. A few extra pumps on the jack handle put the rocker guard flush against the bottom of the tub and put it in line with the bottom of the door, just as intended. I checked the spacing of the welded in section and it too fit flush against the bottom of the tub….nice, very nice.
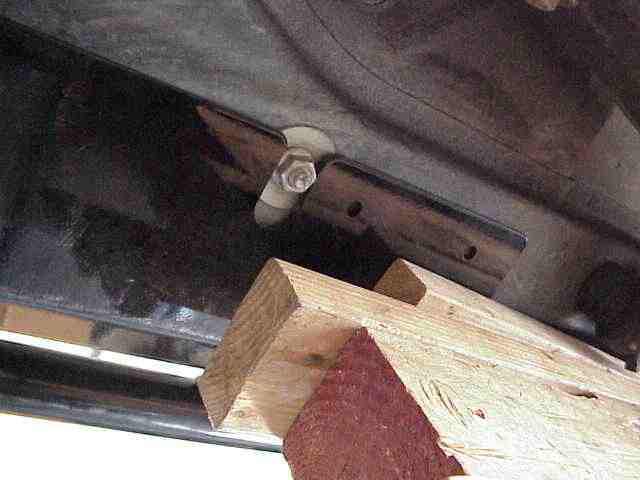 This one caught Mike and I completely off guard. The nut in the above picture is from the floor mount on my front roll bar. Notice the cut out on the rocker guard. Troy does not sell floor tie ins with his sport bar. My bar came from OR-Fab. Regardless, it was one thing I did not have to deal with. Troy’s attention to detail, like this, makes the install go so much easier. (Mike said he had to deal with a similar problem when he mounted his “name brand” rocker guards. Granted, you can’t expect every manufacturer to know all of the various options that might “interfere” with their product, but it is nice when one of them does.)
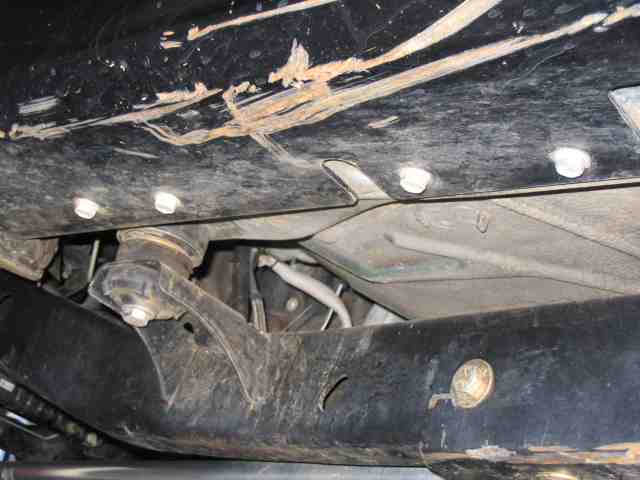
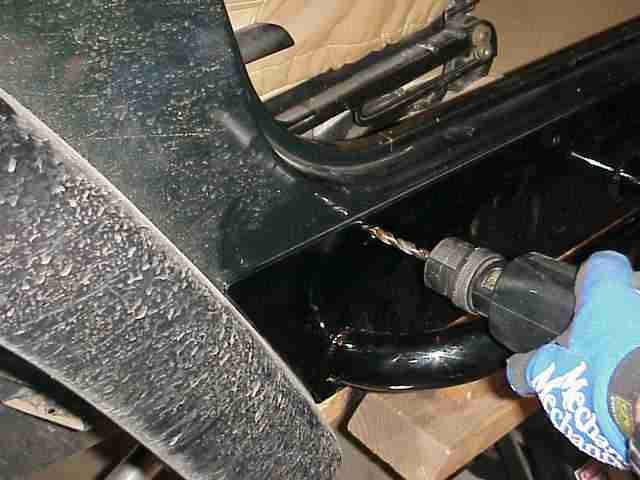 We double checked the fit of the guard and made sure nothing was on the back side of the rocker and then I started drilling holes into the Jeep tub. I did one at each end of the guard, put bolts in them, and then fished with the ones in the middle.
Toys by Troy Rocker Guards
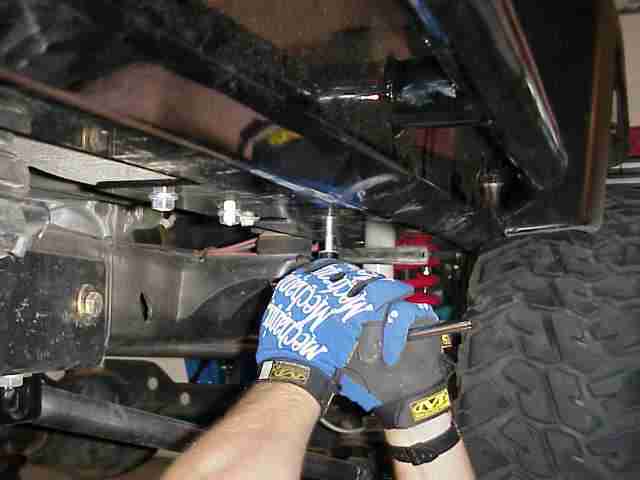
I finished the holes and Mike tightened the bolts on the upper edge of the rocker guard. While he was doing that, I drilled the holes from the bottom of the guard up into the tub. I put the half dozen bolts into the bottom of the guard and did a final check on all of the bolts.
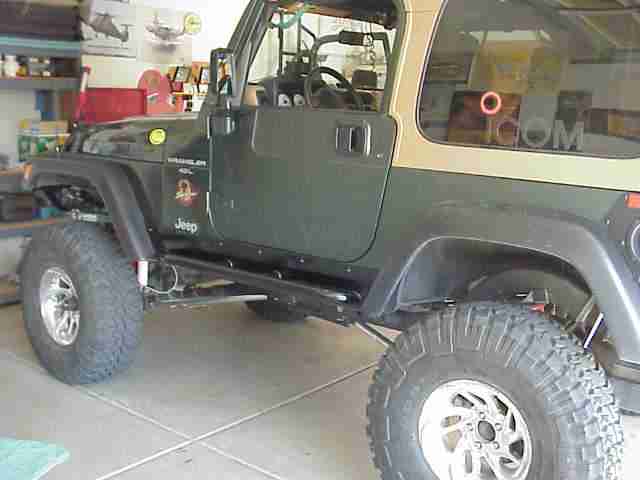 We finished up the job with installing the driver’s side guard and then got started on making some new sway bar links. The guards went on nicely. No need to re-drill a hole or figure out how to clearance something that didn’t fit correctly. As I write this, I’ve not had the TJ on the trail yet (they have only been on for about 6 hours). But, I have no doubt that they will work well. If you are looking for a pair of nicely designed guards, these would certainly do the job. I look forward to testing mine on the rocks.
Update: 10/09/2005
I thought I would post an update as to how the rocker guards are doing. They’ve been on for about two years now and have done everything I’ve asked of them. They are still tight, snug to the body, no mounting issues, etc. They’ve done a very good.
 I had to chuckle a bit after reading an online comment from a guy who said that the self tapping bolts were just begging to get ripped off (or something like that). Even though I have done a fair job of scraping the length of the guard, there is not a nick on the bolt heads. I have successfully folded the center body mount ears over quite well, but again without ever touching the mounting bolts on the rocker guard. From what I heard, he doesn’t have the guards on his vehicle. I’ll trust what I see on my vehicle until something better changes my mind.
Update: 05/26/2006
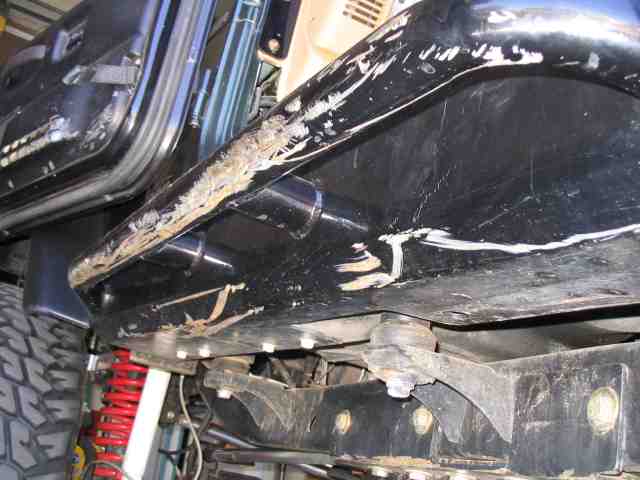
Last weekend, I ran Die Hard, a solid 5.0 trail here in the Phoenix area. It was a challenge on 35″ tires…..two of the six vehicles in our groups were moon buggies on 40″ tires….I was the smallest vehicle on the trail. Anyway, my reason for posting was to show you a picture of the rocker guards.
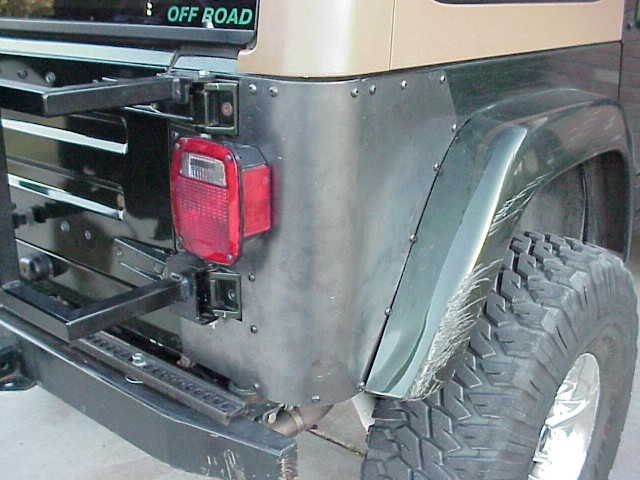
 Here is a view of Lady’s driver’s side rocker guard. As you can see, it is quite well used from front to back. The side sliders didn’t look quite this bad, but they took on some new “finish” too. The heads of the bolts that hold the rocker guard onto the bottom of the tub still have no nicks on them. So much for them ripping out.