Note: Toys by Troy shut down their operation at the end of 2007. Instead of removing this write-up, I am leaving it on the web site for a couple of reasons. The steps for installing it are pretty much the same as one from another manufacturer and so you’ll get an idea of what is involved if you decide to do this type of modification. If you happen to come across one on the used market, you’ll have some information about it that can help you do the installation correctly.
This write-up is being done in two parts. Part 1 covers the installation of the ported steering box that is needed to provide fluid to the hydraulic ram. Part 2 will cover the installation of the hydraulic ram itself….that means when I save some more money to get the ram and hoses, I’ll do the install on it and add the write-up here.
Compared to the older Jeeps who didn’t come with power steering, the TJs power steering system is certainly a BIG step forward for driving on a challenging trail. I honestly can’t imagine what it would be like to go rock crawling with manual steering. However, sometimes the power steering isn’t strong enough to turn a pair of aired down pair of big tires in the rocks. An obstacle can create a situation where the vehicle’s weight works against the power steering and basically leaves you in a position where you can just barely (or not at all) turn the steering wheel.
Adding a hydraulic ram to the steering system can give you back the necessary turning power needed for those tough situations. The steering box is drilled and tapped in two locations to provide the correct power steering flow/pressure to power the hydraulic ram. Since I wasn’t up to the task of determining just where and how the steering box is modified, I opted for an already modified steering box from Toys by Troy. Troy had worked with a power steering company to come up with a steering box that was properly modified to provide the flow and pressure for the ram while maintaining good drivability for on-road use. Some steering box conversions leave the steering less than desirable. This recently happened to a friend of mine and he ended up sending his steering box off to yet another company to have the problems corrected.
This portion of the write-up will cover the removal of the stock steering box and the installation of the TBT steering box. Some time ago, I helped a friend of mine swap out his steering box for a stock replacement. You can use that write-up for another reference on removing/installing a TJ steering box.
Since you have been modifying your TJ for a while (I’ll assume you have if you are looking into ram assist steering), you may have some type of steering box guard. I have a Tomken steering brace that was modified this past year after I peeled it off during a trail run on Die Hard. Before the steering box can be removed, the brace had to be removed from the end of the steering box. If you are running protection your steering box, you will need to remove it in order to get access to the box.
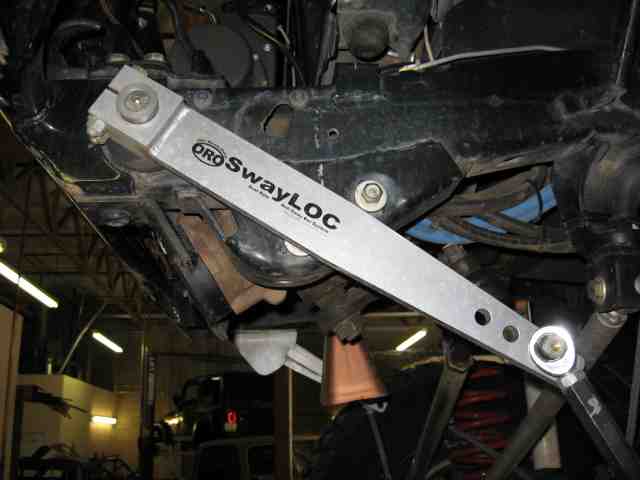
I also had to disconnect the SwayLOC sway bar links as the arms did a great job of covering the steering box mounting bolts. I disconnected the heim joints at the axle and then pushed the sway bar arms up and out of the way.
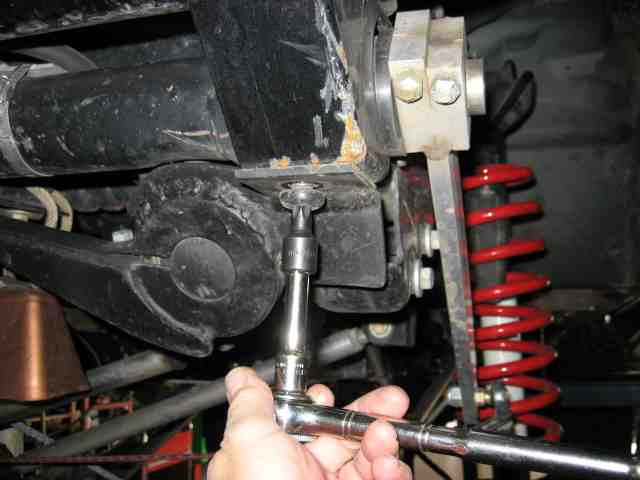
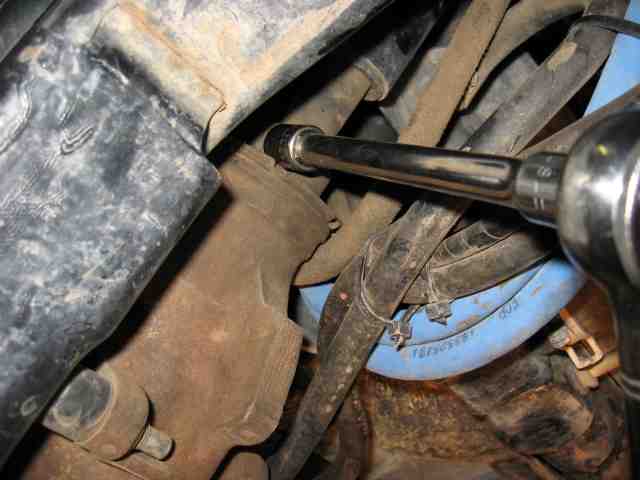
The pitman arm must be removed from the steering box. A 1 5/16″ wrench fits the large nut on the end of the shaft.
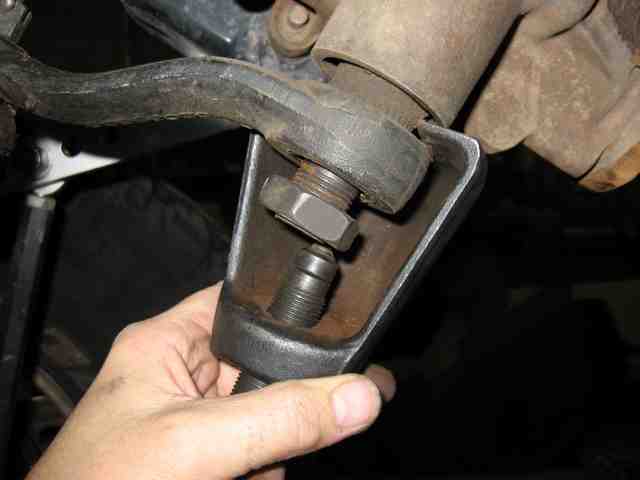
I removed the nut, then slipped the lock washer off of the shaft, and then threaded the nut back on the shaft. I borrowed a pitman arm puller from Troy to pull the arm from the shaft. I must admit I like this puller much better than the one I own. This one looks like about 2/3 of a bell. After slipping the puller over the top of the pitman arm, the threaded bolt is centered and then drawn up against the end of the shaft. (yes, I know it is not centered in the above photo…but then again, it is also not tight yet either) Once the bolt is snug against the end of the shaft, I used a 1/2″ impact wrench to tighten the bolt which pulls the pitman arm down and off of the shaft. The nut is left on the end of the shaft until the arm is free. By doing this, it prevents the possibility of the arm from flying off of the shaft should the pressure build up and then release all at once.
The shaft from the steering column connects to the end of the steering box. A splined collar slips over the shaft and a bolt clamps it tight onto the shaft. Remove the bolt and set it aside as you’ll use it when the new box is installed.
At this point, there are just three bolts and two hoses holding the steering box in place. You’ve almost got it removed.
Some folks prefer to remove the two hoses from the box at this point. It can be difficult to get a wrench onto the hose fittings depending on what kind of bumper you have, winch mounting plate, etc. The first time I swapped out a steering box, I removed the hose connections and then removed the mounting bolts. This time, I removed the bolts and then the hose connections. I’m not sure either way is better than the other.
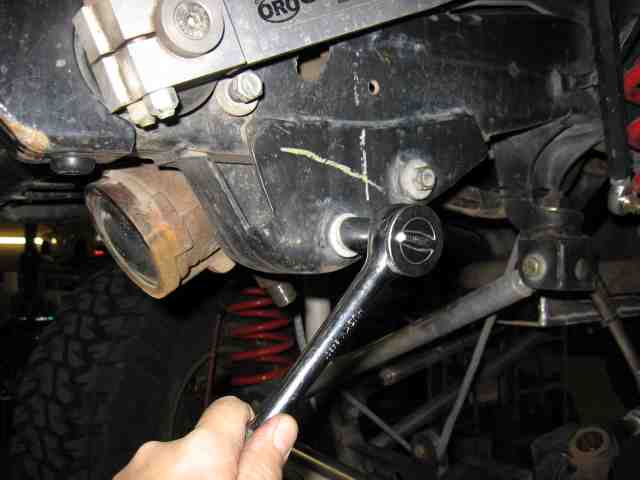
Three bolts hold the steering box onto the driver’s side frame rail. If you have a buddy near by, now is a good time to get an extra pair of hands involved with holding the box while the last bolt is removed.
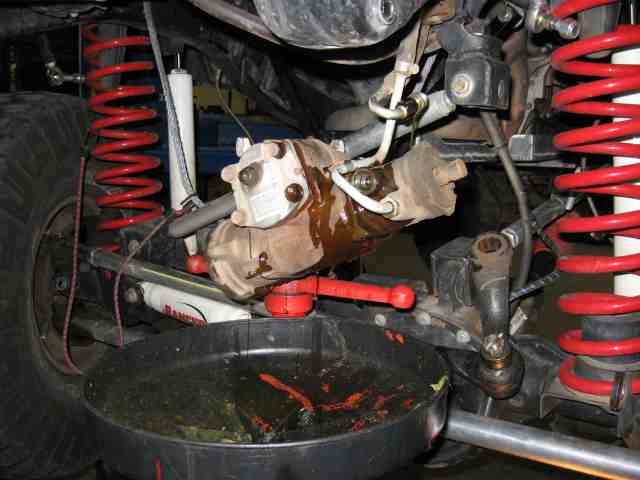
With the bolts removed, I used a piece of wire to hold the steering box while I removed the hose connections and let everything drain into a catch pan. Make a mental note of how the hoses are routed, etc., which will make putting everything back together a little bit easier. You’ll have a fair amount of power steering fluid running out of the box and more so the hoses. I just let everything go for a while until it stops. It’s a good way to drain out the old fluid which is not necessarily a bad thing.
With the fluid drained from the system, the hoses were attached to the new steering box and it was bolted back onto the frame. The mounting bolts are torqued to 70 foot pounds.
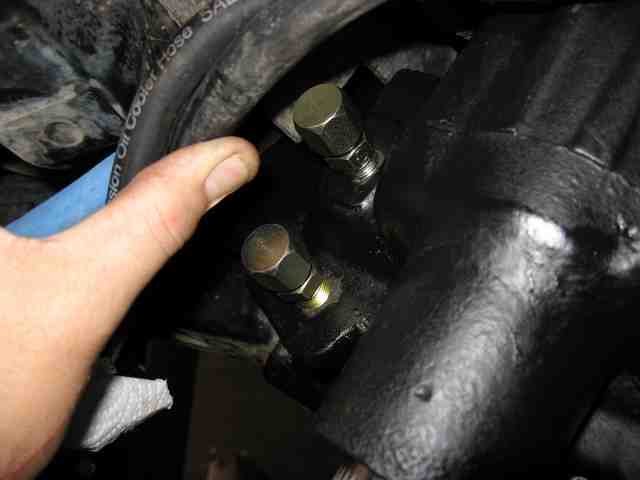
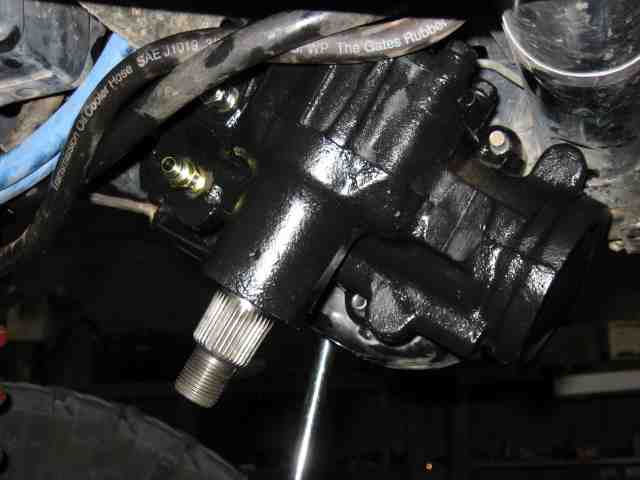
In this photo and the one above, you can see the two ports for the hydraulic ram. I screwed a pair of caps onto the fittings. These prevent fluid loss which would be quite intense were they not there. When I get the ram and hoses, these caps will be removed and the ram hoses will be attached here.
That is it for now until the ram and hoses are obtained. Hopefully it won’t take too long. I’m in the middle of a couple of other projects on the TJ that must be completed first.