Whether it be during a run or in the driveway, there comes a time when you will need to remove your front axle shafts for regular maintenance or an emergency trail repair. I was trying to avoid the emergency trail repair so I decided to pull the front axle shafts and replace the u-joints. While doing so, I grabbed my digital camera (that poor thing is starting to get as much grease on it as my tools seem to accumulate) so I could take a few pics of the process.
I should mention that I opted to remove the axle shaft from the hub and bearing assembly. You could actually pre-assemble an axle shaft and a hub/bearing and carry it as a complete trail spare. When you broke an axle shaft or u-joint, you could swap an entire assembly in with very little effort (assuming you could get the broken shaft out of the axle tube). So, with out any other delay, let’s get that axle shaft pulled!
After putting a heavy duty jack stand under the passenger side of the frame, just behind the front lower control arm mount, I slipped the floor jack under the front axle and raised it just enough for the tire to clear the ground. With the tire removed, remove the cotter pin and the axle nut retainer. Don’t lose the little spring under the retainer.
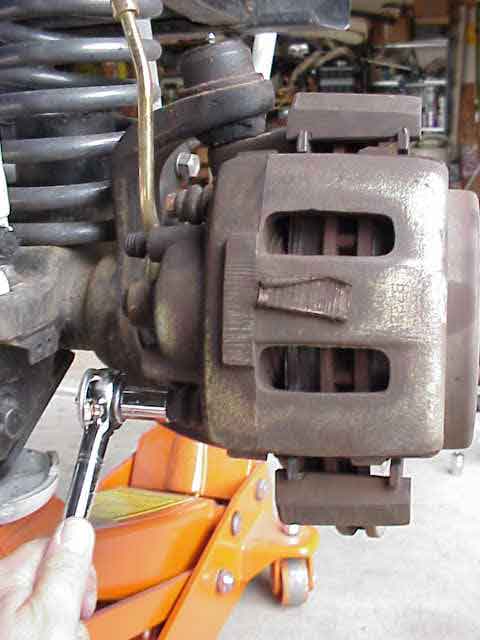
With a 13 mm socket, remove the two caliper mounting bolts. In the pic above, I am removing the lower bolt.
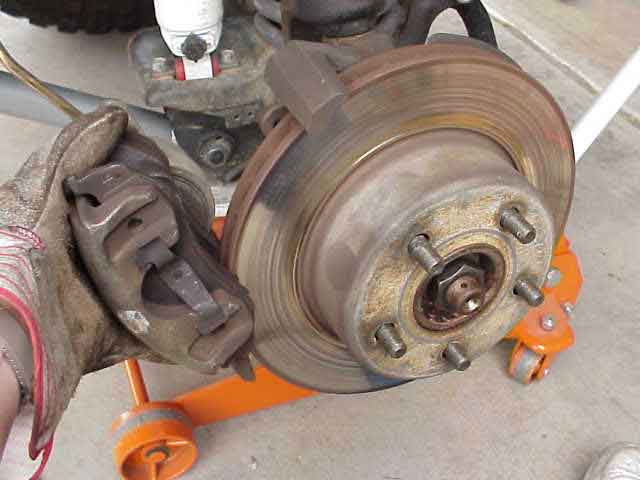
Grab the caliper and pivot it back away from the rotor. Using a zip tie or a piece of wire. secure the caliper up and out of your way. Do not let it hang by the brake hose….hey, we are doing quality work here!
Pull the rotor off of the wheel studs and place it out of the way too. OK, we are getting down to business here. So far, so good, not too difficult.
More Axle Shaft Removal
D-30 Axle Shaft Removal
NOTE: At this point, you have an option. You can skip this step, thus leaving the bearing and hub assembly attached to the axle shaft. You can do a u-joint change in this configuration. It is a little more clumsy and awkward, but none the less, it can be done. Since I was actually going to swap my spare shafts in and overhaul the u-joints on these shafts next weekend, I needed to remove the bearing and hub assembly so they could be used on my spare shafts.
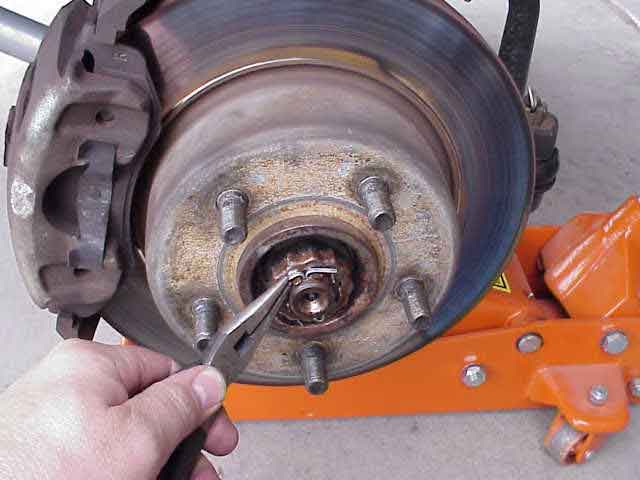
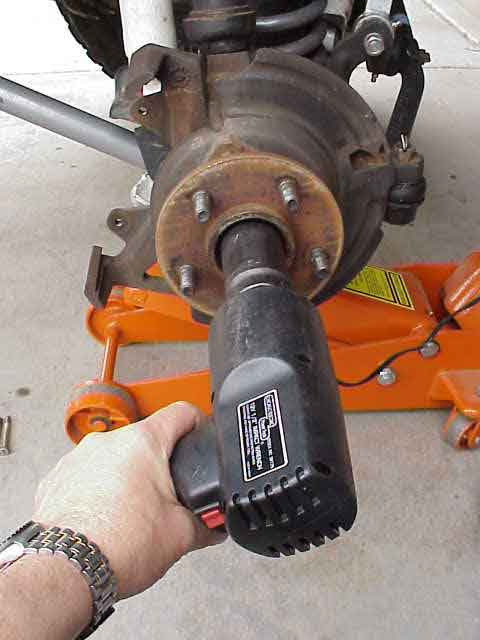
OK….this is probably the hardest part, but it sure isn’t what I would call a technical part….just good ol’ grunt work. You need to take the axle nut off. It can be done with an electric impact wrench (what I am using in this pic), a pneumatic impact wrench, or a great big breaker bar. You will need a 36mm six point socket. I picked up one rated for impact wrenches at the local PepBoys auto parts store. It was something like $10 or $12 if memory serves me. If the nut was torqued to factory spec, it is sitting at 175 ft. lbs. I personally believe they end up getting cranked on a bit tighter than that….but that is just my opinion. Since my breaker bar isn’t long enough (nor strong enough) to give me great leverage, I borrowed my buddy’s 12 VDC electric impact wrench. Don’t laugh, it really does do a pretty good job!
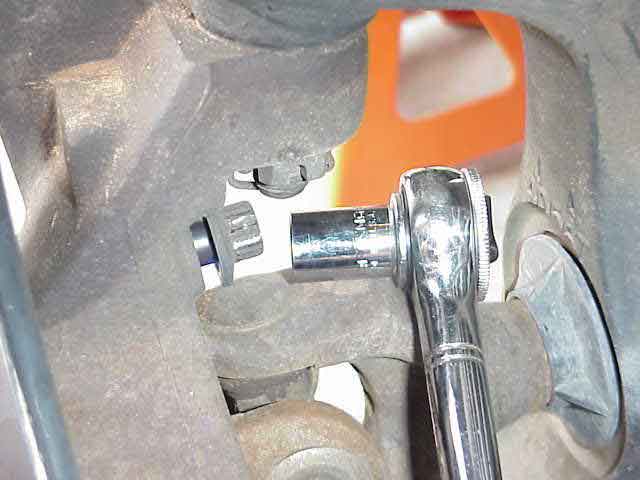
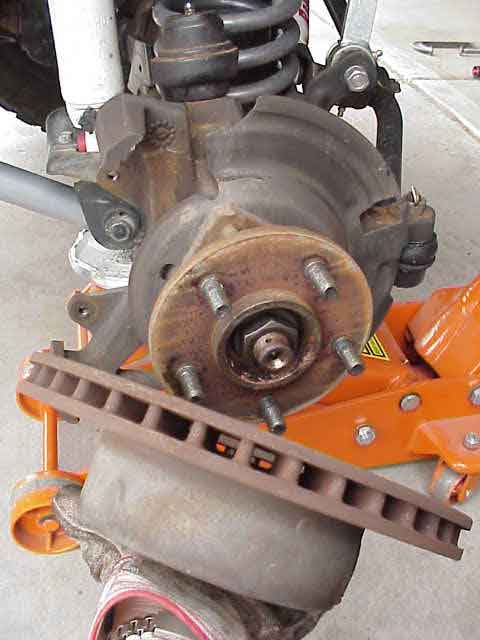
With the axle nut off, you have three more bolts to remove. They are a 13mm twelve point bolt and hold the hub and bearing assembly onto the steering knuckle. You can see me removing one of the bolts in the above photo. When you put these back in, you will want to tighten them to 75 ft. lbs, per my ’98 factory service manual. You should note that for some reason, these bolts, as delivered from the factory, are REALLY torqued down. I would suggest using a 1/2″ drive ratchet on this so as to save your 3/8″ drive 12 point socket from breaking. If you have a clearance problem getting to the bolts, you can turn the steering wheel a bit to offer a better angle for the ratchet.
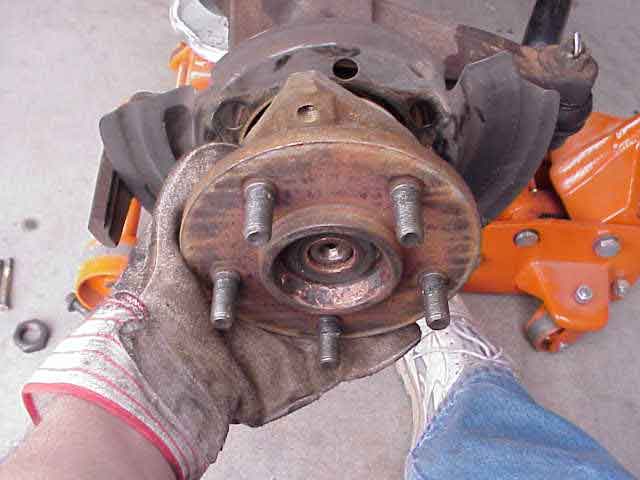
With the last three bolts now removed, grab the hub and bearing assembly and carefully remove it from the steering knuckle. One of mine was a bit tight, due to some surface rust, so I gently tap on it, just a bit, with a small hammer. This was just the ticket to loosen it up. If you find yourself in the situation where the axle shaft is coming right out with the hub and bearing assembly, you can thread the axle nut back onto the shaft, just flush with the end of the shaft. Gently tap it a couple of times with a small hammer. This should allow the hub to disengage from the splines on the axle shaft.
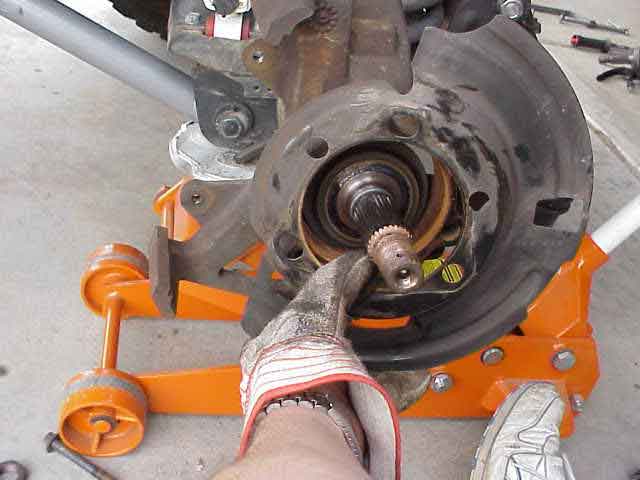
Almost there….just about got it done. The dust shield comes off next. It is sandwiched between the steering knuckle and the hub and bearing assembly. Make a mental note of which way the dust shield is mounted. If other folks are somewhat like me, they have, at some time or another, managed to put the thing on backwards. (Talk about feeling stupid!)
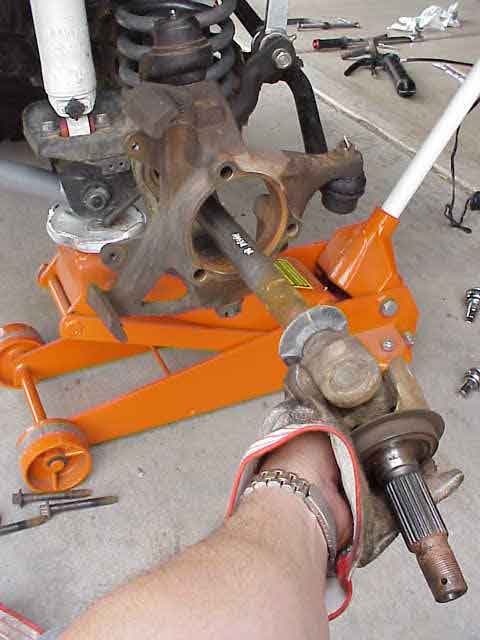
At this point, CAREFULLY pull the axle shaft out of the axle tube. There is a oil seal in there and you don’t want to damage it, else you will have diff fluid slowly leaking out of your axle tube (YUCK!). I always support the axle shaft (one hand on the shaft end and the other right next to the tube opening) while removing or installing it.
When you put your axle shaft back in the tube, the factory service manual recommends that you grease the splines and the area on the shaft where the oil seal rides.
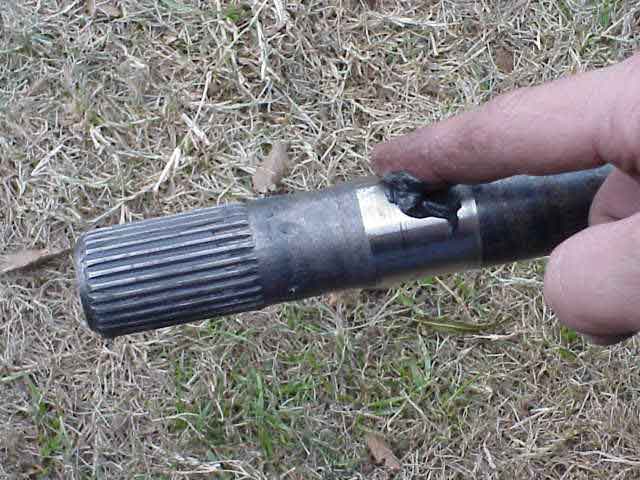
You can see where the oil seal rides….it is the shiny surface on the shaft. I am applying some synthetic grease to this area and will be putting some on the splines as well. Try not to let the axle shaft slide along the length of the tube when you put it in since the grease will obviously work like a dirt magnet.
Just a couple of toque spec reminders (from the factory manual). The axle nut is cranked up to 175 ft. lbs. The three 12 point bolts that hold the bearing and hub assembly in place are torqued to 75 ft. lbs. The caliper mounting bolts are a mere 11 ft. lbs.
For information on how to change the u-joint, now that you have your axle shaft removed, click here.