it’s the first weekend in October, 2006, and I find myself in the Pomona, California for the big Off-Road Expo show. It’s a huge event that caters to the sand buggies, ATV, and off-road 4×4 folks. If you’ve not been there, you need to go and soak up all of the truck, Jeep, and buggy products that are offered. If that doesn’t satisfy your appetite for a day or two, you are most certainly incurable.
Since I was in CA for the show, Robert Yates, long time Jeepin’ buddy from so many off-road trips, provided me with a place to crash for the long weekend. We spent Saturday at the Pomona Fairplex looking at the vendor booths and bumping into friends that I’d not seen for too many years. Saturday evening, Robert hosted a nice BBQ and we all caught up on Jeepin’ stories, trips from long ago, and even managed to squeeze a few old wheelin’ videos into the mix. A good time was had by all.
So….why am I telling you this? It’s the lead in to this write-up…..the Kodiak Dual Battery & Management System. I’ll let Robert introduce the kit and explain his reasons as to why he was interested in the Kodiak product.
I have been looking to make my Jeep more self sufficient due to the fact that I am leaning towards more of an expeditionary style of Jeeping. I have a winch, a Ready Welder and am looking to also substantially upgrade the lighting on my Jeep. As such, I had been investigating a dual battery kit so that I could have more on board power, 2 batteries in case I was stuck while wheeling alone and needed the welder, as well as having a deep reserve for winching purposes. I found there are plenty of kits on on the market for 6 cylinder TJ’s with air conditioning but most all used Optimas and I did not want to use Optimas. I am a big fan of the Hawker Energy Odyssey batteries having had good success with a single PC1200 in my Jeep. Until recently, the only dual kit that could be purchased with the Hawker product was the Northwest Power Industries version that ran the PC925. While it’s a great kit, I wanted to run the 1200’s as I felt the 925’s were a bit to small from a CCA perspective as well as the reserve capacity.
At last years Expo, I ran into a fellow named Yawan from Kodiak Industries and he had a demo version in a Jeep at the Expo that ran the dual 1200’s. After some haggling, a deal was struck and the wait was on for the production version. It was eventually delivered last March and due to home-life changes and work, I was unable to get it installed until recently. When Stu arrived, I already had the new tray swapped in and the 2 batteries installed although I still needed to wire the batteries up through the manger and run the harness into the cab. That’s where we’ll get started with the write up.
Removal of the old tray and the installation of the Kodiak tray is a 1 banana job. The materials are top notch and it fits very well although it is tight and I needed to apply some BFH to the inner fender so we could clear one corner of the tray. The batteries on the other hand require some cajoling but once they are located, the fit is tight and the tie downs are again, top quality. One area of concern, at least with my kit as delivered, was the lack of clear and concise instructions. That may have been resolved with the newer kits although Yawan will answer calls if you phone him with questions. This initially caused a bit of irritation as it was not immediately clear on how the batteries were to be oriented. After some trial and error, I arrived at a decision wherein the batteries would sit with the terminals facing each other.
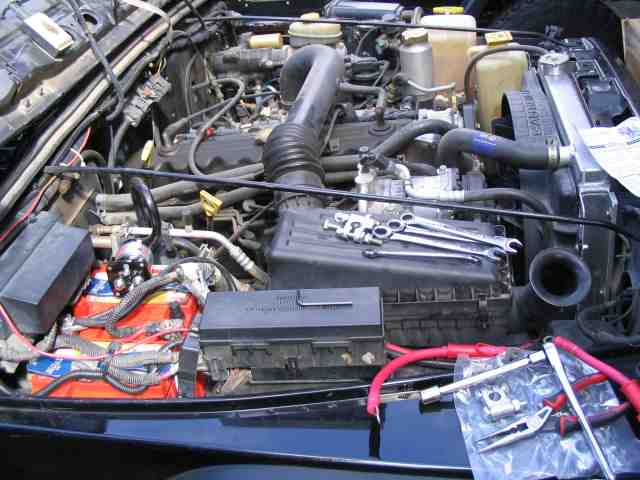
The first step was to locate the manager solenoid…you can see it located on the inside tie-down which came pre tapped for the button-head bolts used to secure it. For a point of reference, the battery nearest the fender is what I considered to be the main or starting battery with the inside battery being the auxiliary.
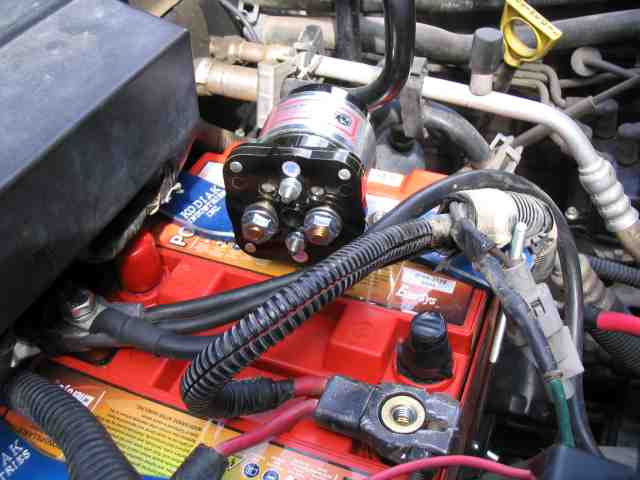
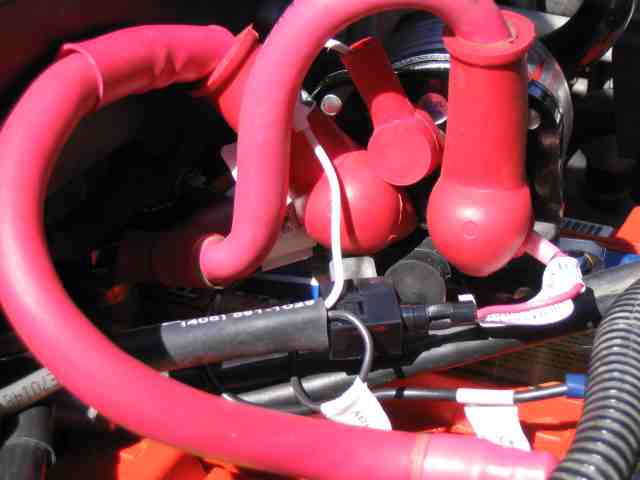
The next step was to determine the cable lead locations that would run from the positive terminals of both batteries to the solenoid and the ground cable which is connected to the negative terminals of both batteries. Kodiak includes pre-crimped and terminated cables for this purpose. The ground wire location was easy to determine and with the Odyssey batteries being tapped for a 9/16″ bolt on top of the stud, no terminals are needed although Kodiak supplies 4 new terminals with the kit.
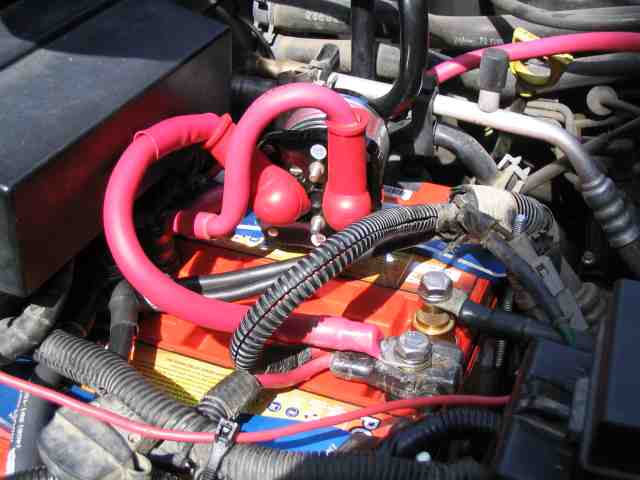
The positive leads were another story as there was a long positive and a short positive cable and again, without instructions, it was a little bit of trial and error to determine which cable should be run from a particular battery to the solenoid. I wanted my auxiliary battery to be tied to my winch so that determined which side of the solenoid the inside battery would be connected to and ultimately, we decided that the short cable would be used for the auxiliary battery/solenoid connection and the long cable would accommodate the main.
More Dual Battery
The positive cable of the winch was next to be attached. It became apparent that it was a little short unless we took the time to re-route the cable through the engine compartment. In making up for the delay in delivering the kit, Kodiak had included a in-line 500 amp winch fuse. The fuse kit had a 12″ jumper included with it which made up the necessary length we were lacking.
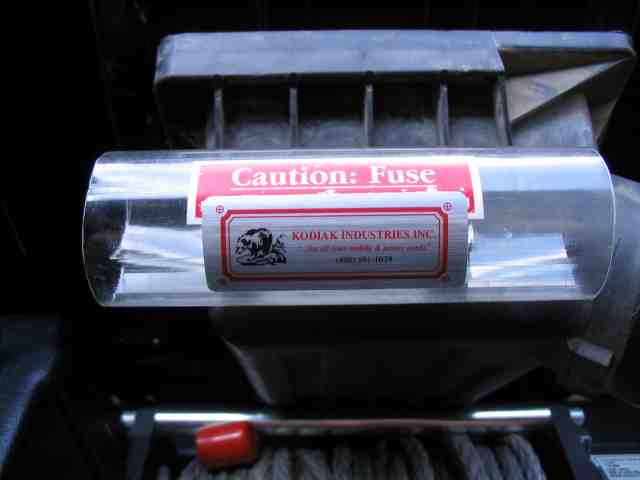
The in-line fuse required a mounting location and after evaluating all options, the end of the air box was chosen as the best location to place the fuse holder. It was within reach of the slightly short winch cable and close enough to the batteries so the jumper would reach.
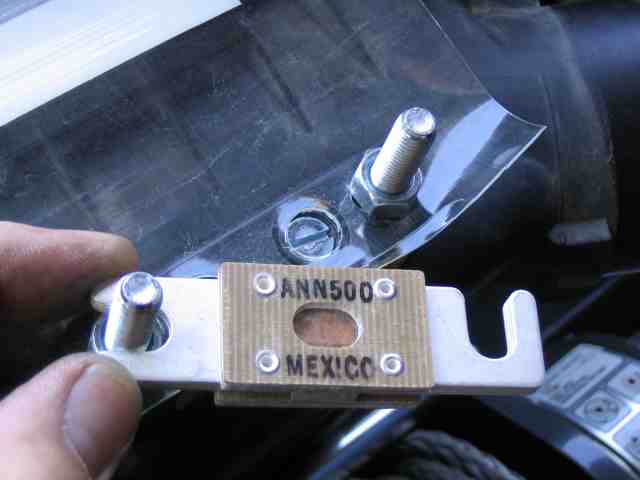
The fuse is a little different looking than what we are used to finding under the hood or behind the glove box. This is due to it’s in-line configuration and the need to flow 500 amps of current without a significant voltage drop. As such, the fuse bolts into the holder rather than the typical spring loaded clip or plug.
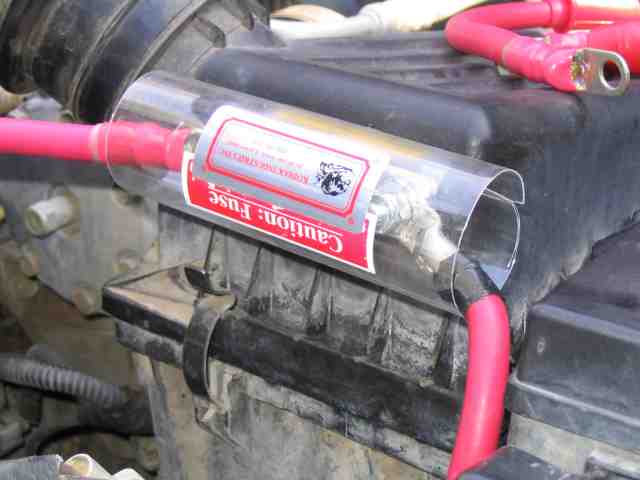
Here is a pic of the complete fuse block assembled and ready to do it’s job. Buss, the maker of the fuse block, uses a thin plastic shield to cover the terminals and prevent any shorts to ground that could occur while wrenching in the engine compartment.
Here is the business of the manager harness where it interfaces with the solenoid. The harness came pre-terminated with quality connectors and terminal boots. The instructions for this part were very clear as to how to properly connect it. The harness is about 5′ long and is designed to penetrate the fire wall (grommet supplied) although we used the ever popular oval shaped firewall plug located above the gas pedal to route it into the cab.
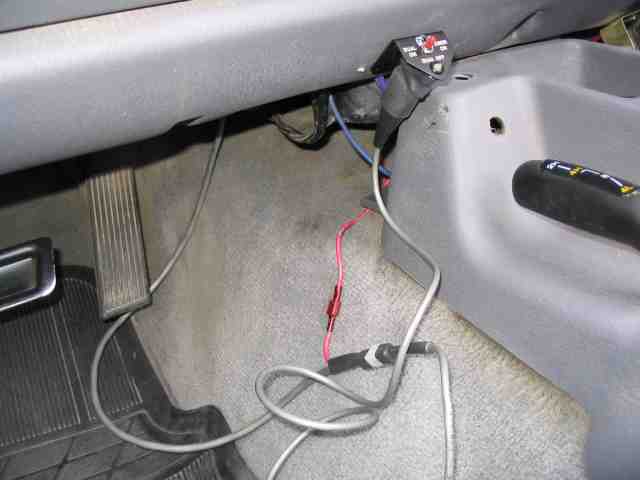
This end of 5′ long harness terminates in a 4 pin plug. The mating 4 pin connector provides a working pigtail harness that includes the switch and LED indicator. The last electrical connection needed for this end of the project is a 12V switched ignition source. The parts for this connection are included in the kit. For those folks with early model TJs, you can find a 3 amp switched source behind the glove box. For later year vehicles, you will need to tap an ignition wire with the supplied wire tap.
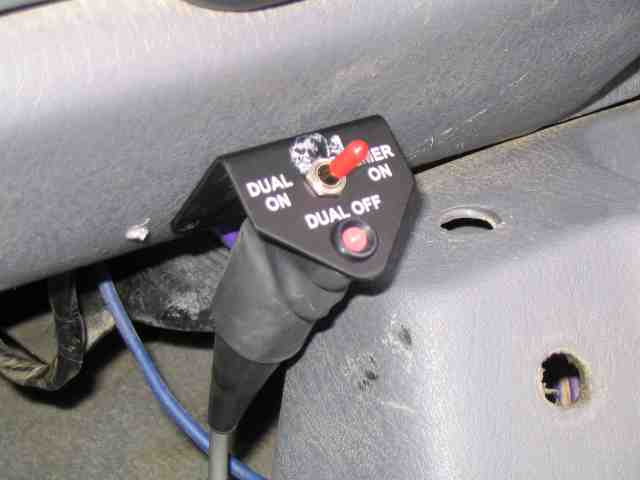
It was time to test our handiwork. With the ignition switch turned on, the LED illuminated and the solenoid could be heard cycling on and off as the mode switch selected the main and/or auxiliary batteries.
(Stu back at the keyboard now.)
I want to thank Robert for letting me help him wire up his dual battery setup. I think it was a Tom Sawyer thing….he knows how it is when I get around an electrical project (ha ha).
But really…..it was fun wrenching with Robert and I am quite sure his new dual battery configuration will do an excellent job. I was totally impressed with the quality of the hardware, etc. that was included in the kit. I am hoping that the install instructions will be improved on in the future (I believe Robert already touched on that) as for some folks, it would leave them somewhat in a bind, in my opinion. Buy hey, it wouldn’t be the first time they used a write-up from this site to get through the confusing parts of the manufacturers documentation.
Perhaps some day I will get something like this installed in my TJ. I can think of a few times where I managed to load test my battery with the head lights and found myself in need of a battery jump from someone else in the parking lot. We all know it happens and this is one easy way to prevent it.
Good trails and remember to TREADLightly!