Note: Toys by Troy shut down their operation at the end of 2007. Instead of removing this write-up, I am leaving it on the web site for a couple of reasons. The steps for installing it are pretty much the same as one from another manufacturer and so you’ll get an idea of what is involved if you decide to do this type of modification. If you happen to come across one on the used market, you’ll have some information about it that can help you do the installation correctly.
Your gas tank is a vital component on your vehicle. You only have one of them and so poking a hole in it, miles out on the trail, is a bad thing. Sure, you carry a spare tire but who carries a spare gas tank? To top it off, the TJ’s tank is in a rather vulnerable position and hitting it when coming off of a ledge or big rock is very common. And as if that was not enough, the factory “skid” is quite poor. In fact, on the earlier TJs, it was more of a sheet metal tank support rather than a skid. In the past few years, DC has put a few more ounces of metal into the gas tank cover, enough I guess that it now qualifies as a gas tank “shield”. But a skid it is not….and so you need to get one when you start doing your off-highway trails.
For this write-up, I’m actually replacing an aftermarket gas tank skid with a new aluminum gas tank skid made by Toys by Troy. Since the steps involved are very similar to replacing the factory “shield” with an aftermarket gas tank skid, I think you’ll find the write-up helpful for when you do your gas tank skid installation.
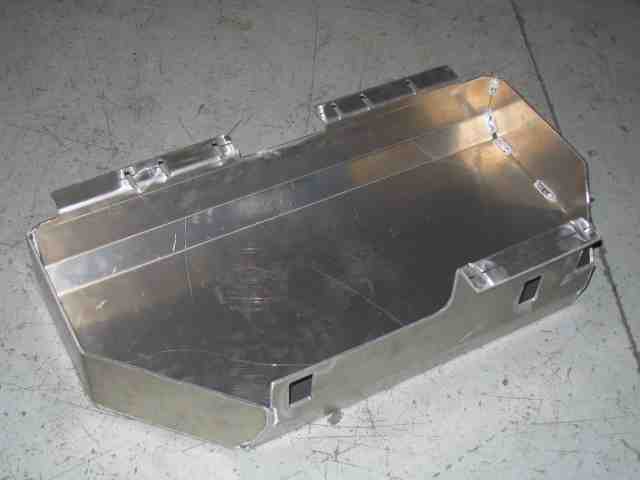
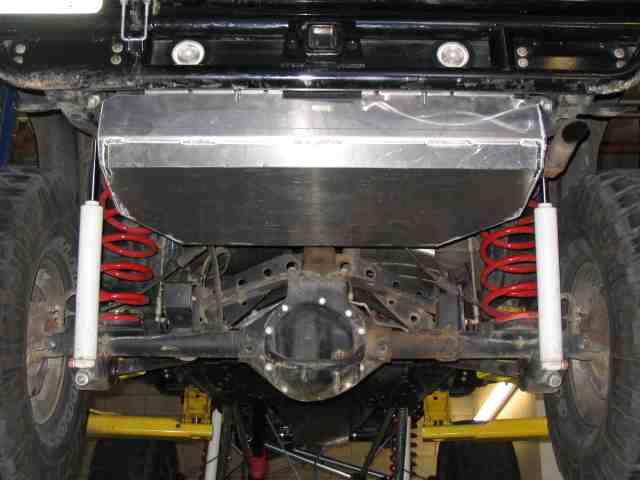
This aluminum skid is made from 5052 alloy that is 3/16″ thick. A second 3/16″ layer was cut and welded to the bottom and rear edge of the skid, making the bottom 3/8″ thick. The weight is approximately 31 pounds, which is right at half of the weight of the steel skid plate it replaced.
The project is pretty straight forward…..lower the tank, put on the new skid, and secure the tank back into its regular position. If your tank comes with installation instructions from the manufacturer, follow them. My first gas tank skid was from Tomken. It came in a cardboard box….that was it.
Let’s get started by dropping the gas tank.
Gas weighs about 6 pounds per gallon. If you have a full tank, do yourself a favor and do the swap when you have a quarter tank or less. It is easier to handle the tank when it is not nearly so full. A full tank will come in at better than 120 pounds (including the gas tank itself). No need to wrestle that thing around when you could be doing it when it was much lighter.
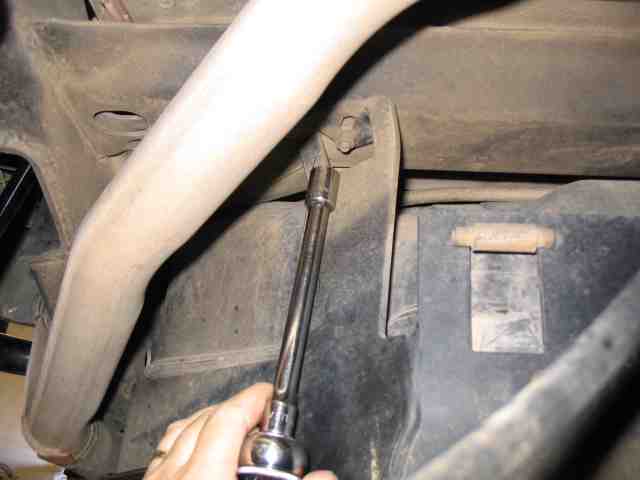
In order for the tank to be dropped, the filler hose and vent tube needs to be removed. Some folks remove them at the tank by loosening the hose clamps and slipping the hoses off of the tank. I find it easier to remove the 4 screws that hold the filler neck in place. A Phillips screwdriver makes short work of the 4 screws. With the screws removed, the filler will be free to move as necessary when you lower the tank.
Before removing any of the mounting hardware, you need to figure out just how to support the tank BEFORE the mounting hardware is removed. If you are going this in your driveway (which is a great way to do it), a floor jack placed under the gas tank works well to manage the tanks up and down movement. In my case, I had the vehicle on a lift at the shop and so used a tranny jack to support the tank before removing the mounting hardware.
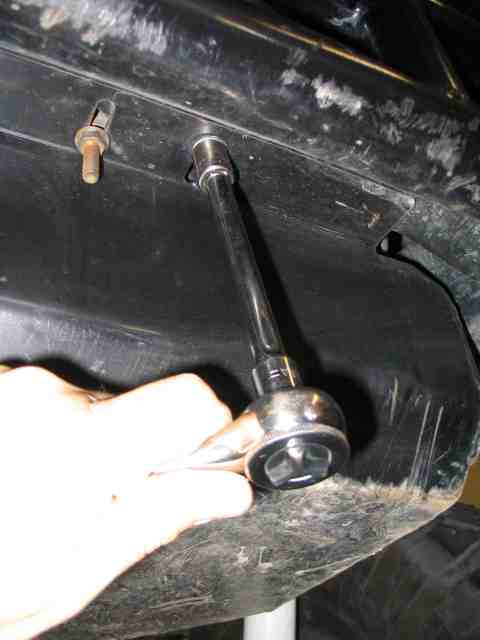
With the jack supporting the gas tank, remove the nuts from the studs along the rear edge of the gas tank. There are about a half dozen of them along the rear of the tank. A half inch socket works well for this.
On the front edge of the tank, there are three more nuts to remove. One is near the exhaust pipe and the other two are located more towards the driver’s side of the tank.
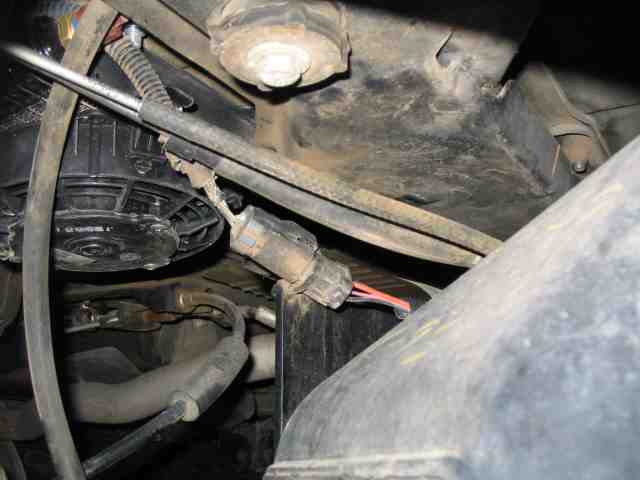
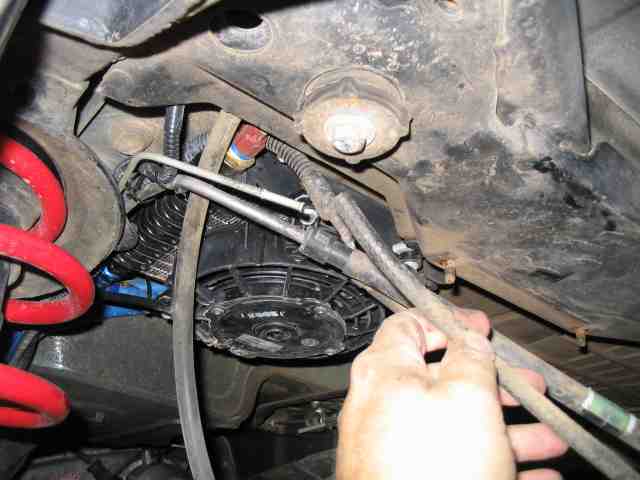
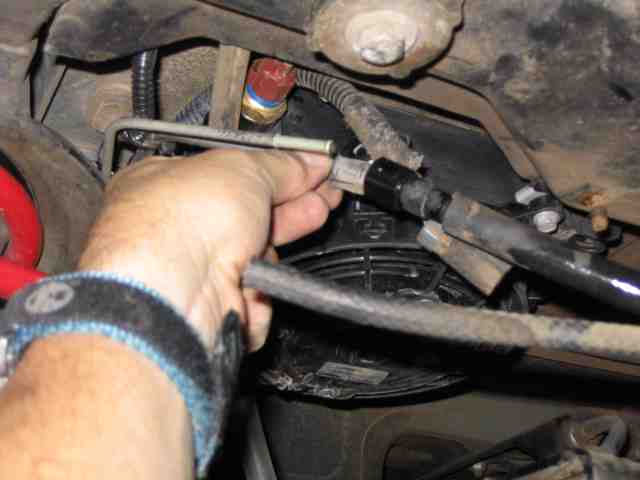
With the mounting hardware removed from the front and rear areas of the tank, SLOWLY lower the tank several inches. Do not let it down all the way as you still have one electrical connector, a gas line, and a vent line to disconnect.
The smaller diameter rubber vent line can be slipped off of the metal line. There are no clamps to remove, just work it back and forth a bit and slip it off the metal line.
Aluminum Gas Tank Skid
The gas line has a fitting that can be separated quite easily. Remember that you will have some residual pressure (and gas) in the line so you might want to drape a rag over the fitting as you pull it apart. Mine did not “spray” but it did dribble an ounce or two of gas. The fitting is separated by pushing the two plastic ears inward so that the ears disengage the metal collar they lock in to. With the ears pressed inward, gently pull the fitting apart.
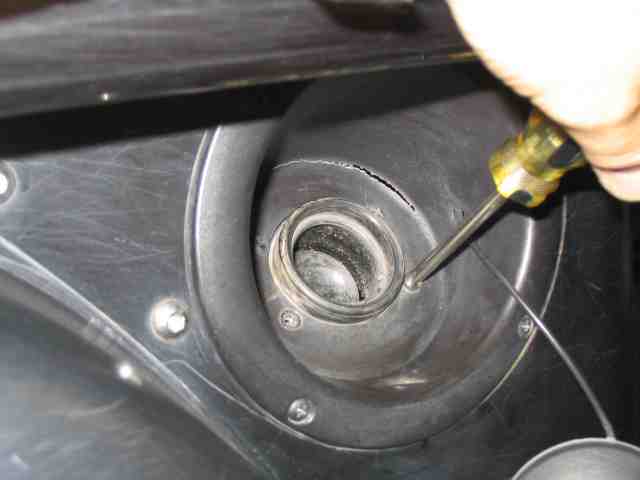
Note: ’97~’04 vehicles: The electrical connector has a red locking tab on it. Push the red tab to unlock the connector and then squeeze the vehicle side of the connector to release it. Gently pull the connector apart while squeezing it. It is rather difficult to describe, but like most electrical connectors in the TJ, it will come apart when you get the correct piece pushed into position.
Note: ’05~’06 vehicles: (I got this from one of the TJ forums….I’ve not verified it since I don’t have that TJ.) Pull the red tab all the way out of the plug and set it aside. It comes right out. Press down on top of plug (it does not seem to move or move much at all, but it does move) and wiggle the connector side to side while trying to unplug it. It is a bear to do and have to press down on thumb tab the entire time. Here is a nice tip. The electrical connection wire is the longest connection under there. With my Budget Boost 2 1/2 lift , 31″ tires , and 1.25″ body lift the fuel tank itself can sit on the ground with no jack under it with out the wires being pulled tight.
At this point, you have the fuel/vapor lines and electrical connector disconnected. Lower the tank further, making sure the filler hose doesn’t get hung up on anything as it slides down the inside of the rear corner. Some vehicles will have a ground stap attached to the filler hose. Mine had one and it was clipped to a lip on the tub at the other end. Just push the clip off of the tub to disconnect the grounding strap.
A picture of the tank completely removed from the vehicle. The filler hose is on the left side. Two metal straps hold the gas tank in the skid. Carefully bend them toward the front edge of the tank. You may have to carefully unplug one of the vent lines to get the strap past it. The straps will be used on your new skid so remove them from the factory shield.
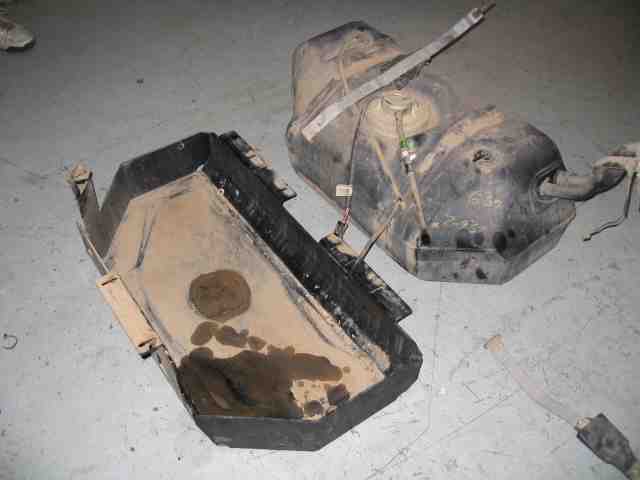
Lift the plastic tank out of the factory skid. (You can see the wet spot on the old skid where the gas line dribbled a bit of gas when I disconnected it.)
Installation is pretty much the opposite of the removal. Place the plastic tank into your new skid and put the metal straps back into position. Carefully raise the tank up until you can make the electrical and gas line connections. Watch the placement of the vent lines so that they do not get pinched when the tank is completely in position. Doing so will most likely cause a Check Engine light on your dash.
Replace the mounting hardware and secure the filler hose in place using the previously removed Phillips screws. Again, make sure none of your hoses are pinched between the top of the tank and the cross member above the tank.
That is about it. Check your hose connections one more time and then start up your Jeep to make sure all is working correctly. If your engine won’t start, check the electrical connector again. Chances are you do not have it plugged together correctly and so the fuel pump is not supply gas to the injectors.
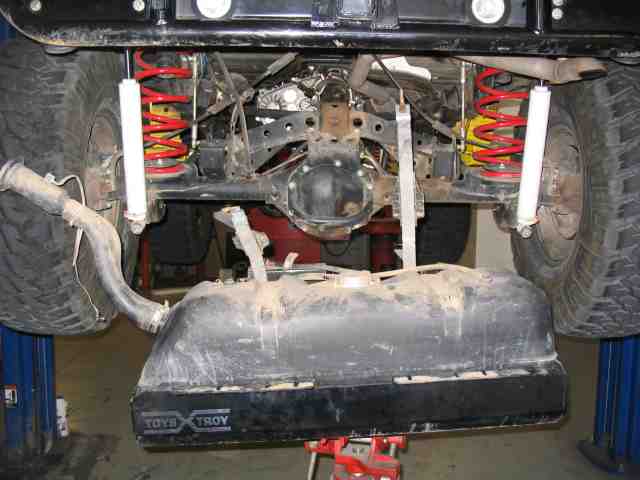
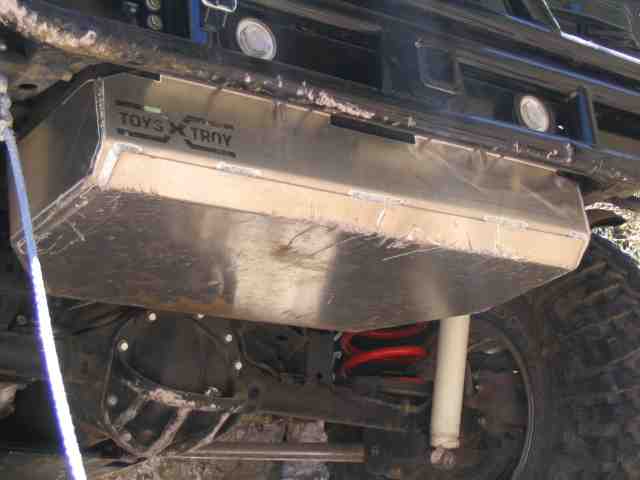
Here is a picture of my new skid, bolted in place and ready to try out a few rocks. It was installed just a few days before my 2006 Moab run. When I get done with the run, I’ll try to remember to post some comments on how the skid worked.
Update 5/21/2006:
Of course, no one knows how good a skid works until it is put to the test…..in this case, where the rocks meet the aluminum.
I had a chance to evaluate its performance yesterday, on a local trail call Die Hard. We ran it with 6 vehicles….two rock buggies and 4 TJs. I was the smallest TJ with 35″ tires…..everyone else had 37 or 38″. The buggies were on 40″. Needless to say, it was a difficult trail (for me at least).
Here is a picture of the skid, about 50 yards from the end of the trail. It did everything I asked of it and more. The winch line is going back to one of the buggies…..he blew a rear axle on a waterfall climb. Did I mention this was a hard trail? The diff guard and rear bumper….all that freshly ground up white rock residue…..a testimony to there being plenty of rocks to present a good challenge.
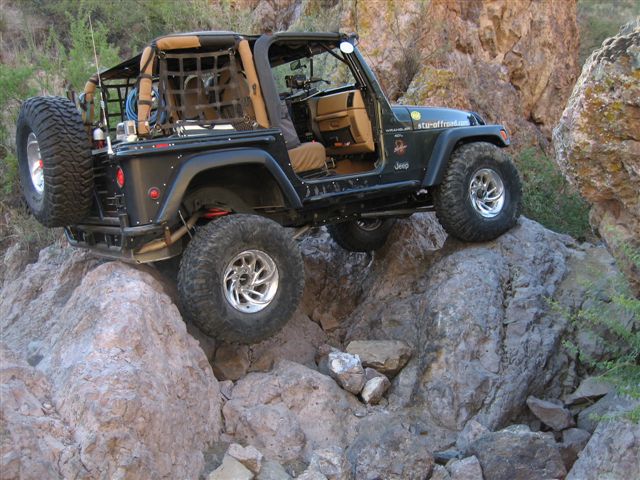
Another picture of the aluminum gas tank skid doing it’s job. Notice the air below the passenger rear tire? The skid is sitting on the rock which is holding up the rear of the vehicle. (yes, I made it through there OK)
As I said, the aluminum skid did everything I asked of it and more.