Carrying a fire extinguisher in your Jeep makes very good sense. Few vehicles are as highly modified and put into more challenging situations than our TJs. As such, fire is a risk that cannot be ignored. Not everyone’s electrical wiring skills are as good as they should be and so electrical fires are a reality. A fuel spill (lots of folks carry Jerry cans filled with gasoline) can lead to a fire. Take either of these possibilities and combine them with a roll over…..a fire can certainly occur. It may not be your vehicle but it could be your friend’s rig or perhaps a stranger you encounter out on the trail. Having your fire extinguisher handy and quick to get into action is important. Having your fire extinguisher in a sturdy, reliable mount is a necessity. Anything less and you are….well….playing with fire, as they say.
I’ve tried no less than three fire extinguisher mounts over the years. With this new mount, available from Off-Road Solutions, I think I might very well have found the last one I’ll ever need.
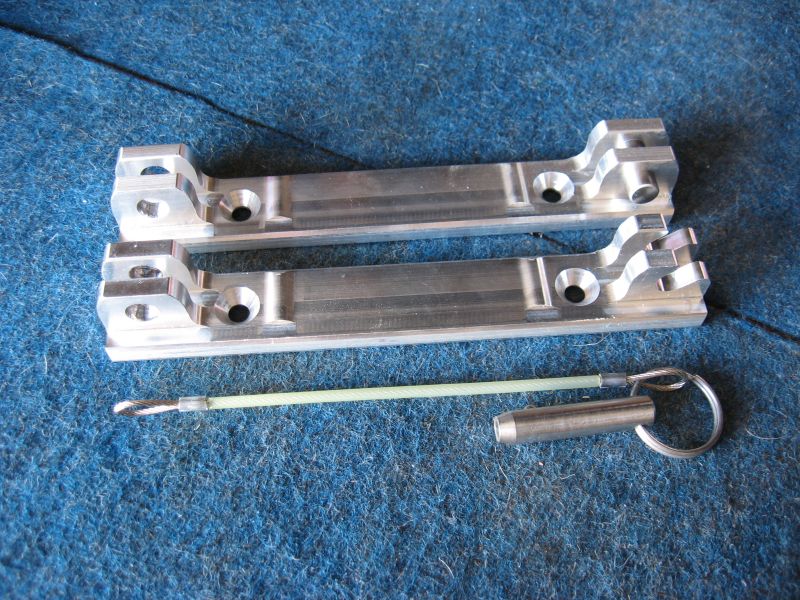
Machined from 6061-T6 billet aluminum, the two piece mount is both simple and rugged. One half of the mount is attached to the fire extinguisher using a pair of regular hose clamps. The other half of the mount can be attached to another round surface, such as a roll cage bar, or to a flat surface. Both parts of the mount are designed to use either straps (hose clamps or industrial strength cable ties) or counter sunk screws for mounting purposes which allows for a variety of installation options. Note that mounting hardware is not included with the mount. I picked up the exact size (3 1/2″) hose clamps to fit my extinguisher for $3.27 (tax included) at the local auto parts store.
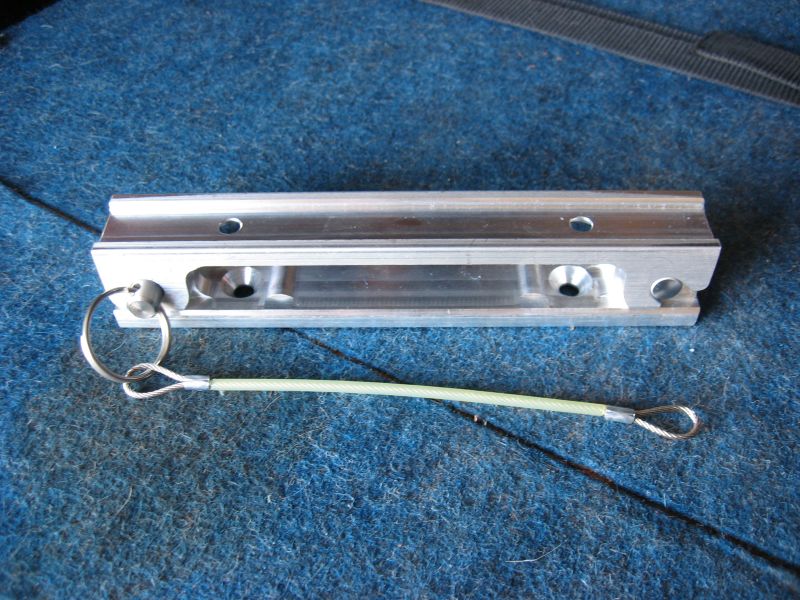
As you can see in the above photo, the two pieces hinge together (using a 316 stainless steel pin) and are then locked into place with a 3/8″ stainless steel retaining pin. When assembled, the mount is 7″ x 1.25″ x 1″. The retaining pin is tethered on a nylon coated 6″ stainless steel cable. The attention to detail is what I appreciate most about this mount. For example, note the machined ridges, on the inboard sides of both mounting holes (in the above photo). These ridges prevent the hose clamps from moving on the mount. The other half of the mount has these same ridges on it as well.

The retaining pin uses a spring loaded detent ball to secure it in place. A cheaper design would have used a clip through a hole in the pin instead of the detent ball. While that option would work, it would also make it slower to remove the retaining pin and put the fire extinguisher into action. It would also make it easy to lose the clip.
Aluminum Fire Extinguisher Mount
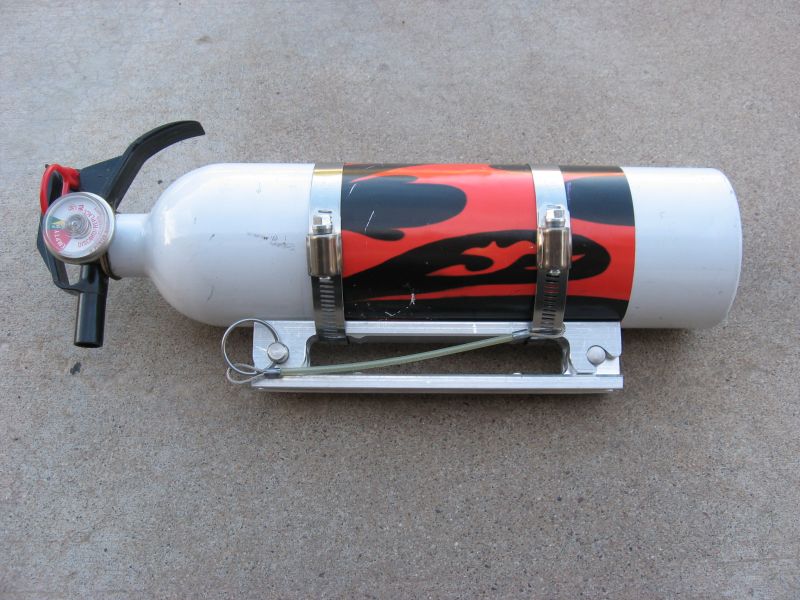
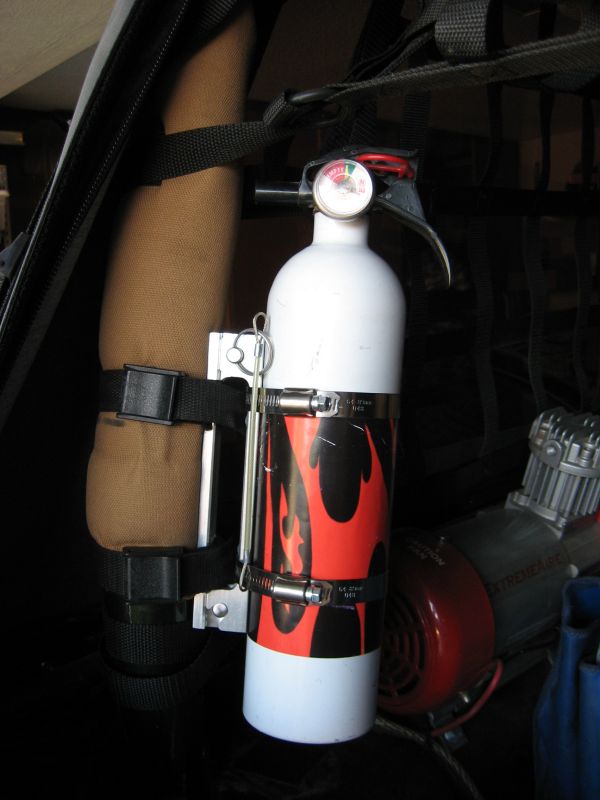
Here is the mount attached to the fire extinguisher. As you can see, a pair of hose clamps firmly secures the extinguisher to the mount. I’ve attached the tether to one of the hose clamps. Unless the hose clamp is removed, you won’t be misplacing the retaining pin.
Another thing I like about this mount is that it will accommodate various sizes of extinguishers. A lot of the mounts I have seen (and used) would fit a specific size extinguisher and that was it. This mount is not married to a specific size fire extinguisher being strapped to it. All you have to do is get a different size hose clamp.
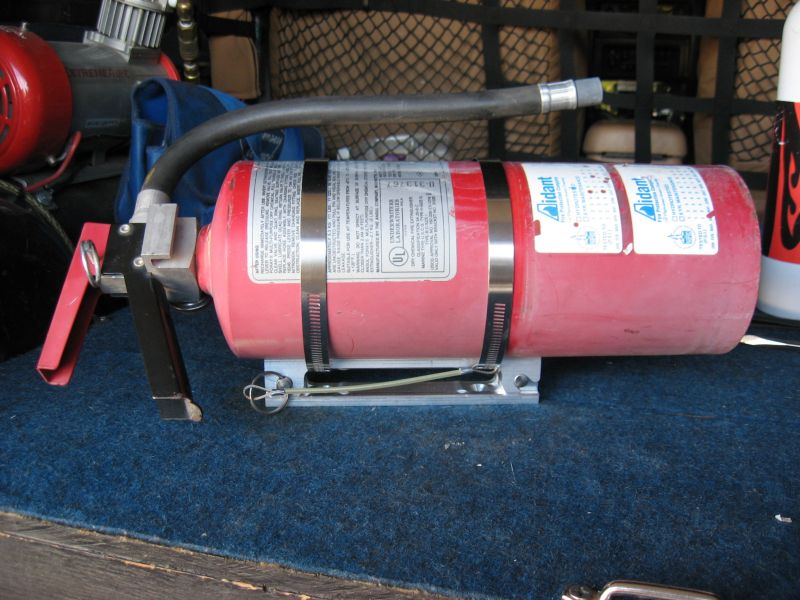
I was trying a few different mounting mounting options. In this case, heavy duty nylon straps are being used to secure the mount to my TJ’s roll bar.
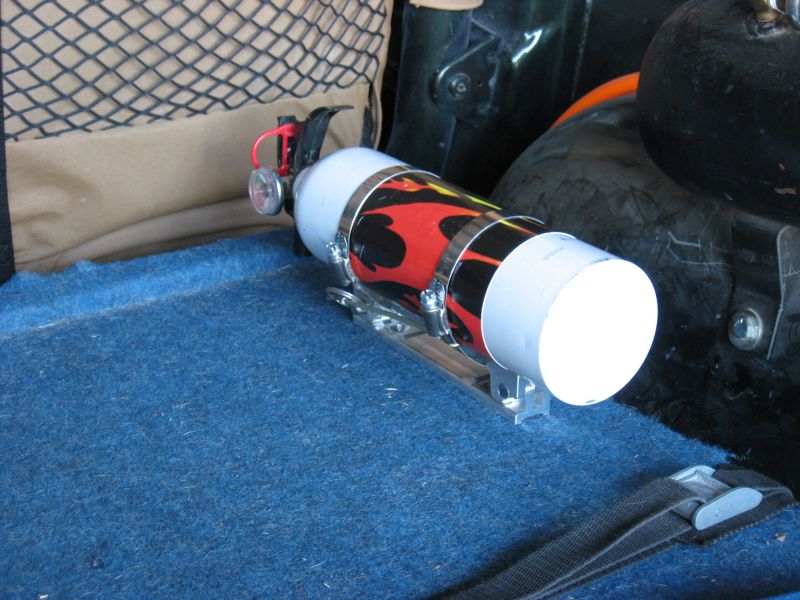
A pair of wood screws (or bolts) with counter sunk heads will secure the mount to my rear storage box that is bolted into the rear of my TJ. Since the mount is designed to be used on both flat and round surfaces, you really have no limitations as to where you decide to mount it. As long as you can easily get to the extinguisher when you need it most, any reasonable location would be a good one.
I’ve exchange a number of e-mails with Billy, the owner of Off-Road Solutions, since I found out about this fire extinguisher mount. Billy designed it and uses a local machinist to produce these top quality mounts. For the folks that only want to purchase “Made in USA by a wheeler for wheelers” products, look no further….you found it. For the folks that appreciate the weight reduction that aluminum brings to the table, you found it. For the person that wants an upgrade from the plastic mount that comes with some fire extinguishers, you found it. For the person that wants his TJ to be a bit better than the others on the trail run, you found it too.
That is about it for now. Check out Billy’s web site for pricing and ordering info. Do yourself a favor and tell your significant other that you found the perfect gift for them to give you….Christmas, birthday, anniversary, etc. If that doesn’t work, just buy one for yourself and call it good.
Aluminum Fire Extinguisher Mount
So, you have decided to save a few dollars (not to mention the piece of mind knowing that it was done correctly) and do the transfer case or transmission fluid change yourself. When you crawl under the vehicle, you can get somewhat overwhelmed at all of the places that look like they might be a drain or fill hole. While this page is far from capturing every vehicle, I’ll try to add to it as time goes one so that all of the folks doing Maintenance 101 will have some help in identifying the right place to pour the new fluid.
One thing to remember when doing your fluid replacements….make sure you open the fill plug first. That way, you know you will be able to put fluid into it once you pull the drain plug and all of your old fluid has drained out. I’ve heard from a few folks who drained first and then discovered they could not get the fill plug open. DOH!
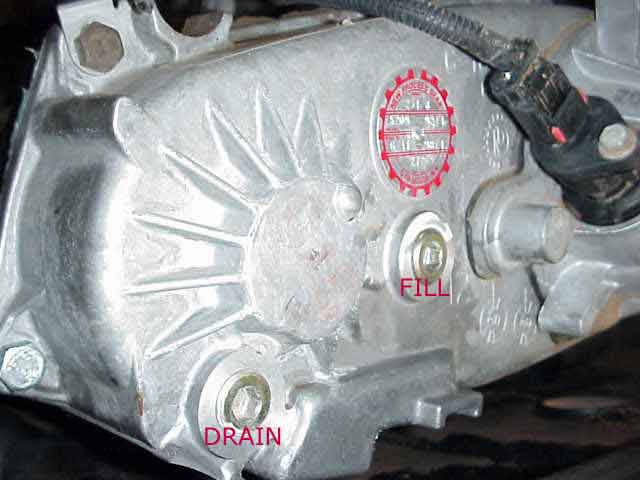
NP231 Transfer Case in ’98 TJ 4.0L
This view is from the rear of the TJ, looking forward. The t-case is located right at the rear of the cross member (big skid plate) and has the rear drive shaft connected to it. Both the fill and drain plugs use a 10mm Allen wrench. From the factory, they are really cranked in tight. I had to use a 1/2″ impact wrench to get one of them out.
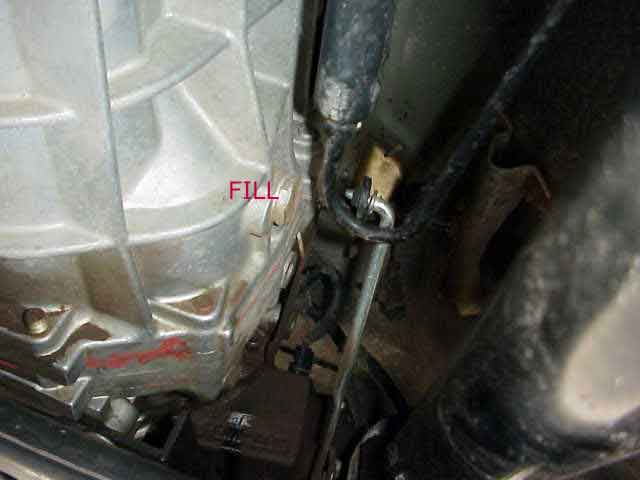
AX-15 5 spd manual transmission in ’98 TJ 4.0L
The AX-15 fill plug is located on the driver’s side of the tranny, near the front of the skid plate and about half way up the side of the transmission housing. This view is take laying on your back, with the front drive shaft just above your right shoulder with the top of your head towards the front of the vehicle. It uses a 15/16″ socket or wrench.
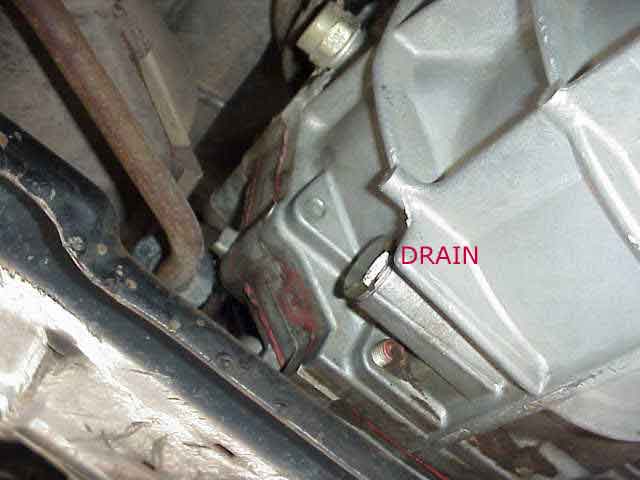
AX-15 5 spd manual transmission in ’98 TJ 4.0L
The drain plug is located on the passenger side of the tranny, near the bottom of the transmission housing, just above the front end of the skid pate. This view is the same as the picture above, but you are looking up at the passenger’s side of the tranny instead of the driver’s side.
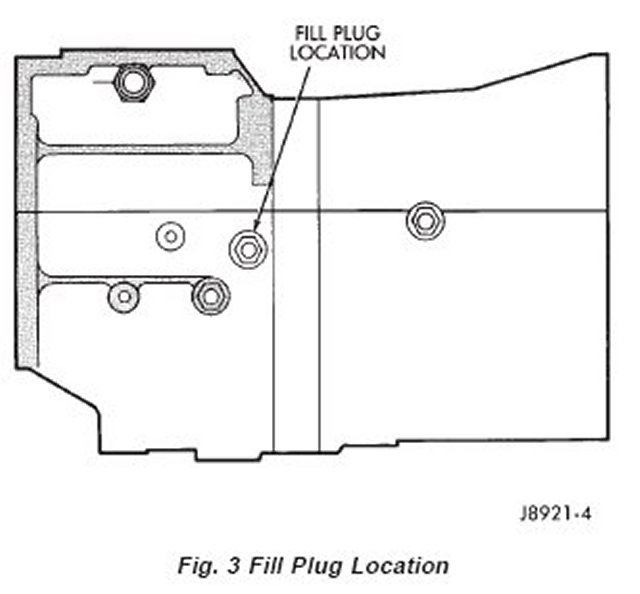
As I don’t have an AX-5 to take a picture of, you’ll have to settle for this drawing. This would be viewed from the driver’s side of the vehicle (the front of the vehicle is to the left of the drawing).