NOTE: This conversion alters one of the safety devices (the brakes) on your vehicle. If you should decided to undertake this conversion, it should be performed by personnel who are competent to conduct such alterations to a vehicle. This conversion can result in changes to your vehicle’s handling and braking ability. This is not a step by step set of instructions on how to do it, but rather a summary of the various things I did to accomplish my conversion. Any similar conversion work performed on your vehicle is done at your own risk.
Note from Stu: Bill sent me an e-mail and asked if I would be interested in adding some D35 disc brake conversion info to the web site. He stated that there was not too much of it available on the net and thought it would be helpful to the other D35 owners who wanted the convenience of disc brakes. So a big thanks to William for the pics and his comments from his D35 disc brake conversion.
A few weeks ago I was checking my drum brakes for a routine inspection and adjustment. I pulled one drum off but the other decided it was going to stay; this was the last straw with the rear drum brakes. I had been looking at Stu�s Off Road web site and was inspired when I seen the article on the rear disc brake conversion. His article covered the Dana 44 and my TJ has the typical Dana 35C so I set out for new territory.
I found that the line of Jeep Grand Cherokees with the Dana 35C was a great donor jeep. I pulled my rear discs off of a 1996 Grand Cherokee that had taken a hit to the rear.
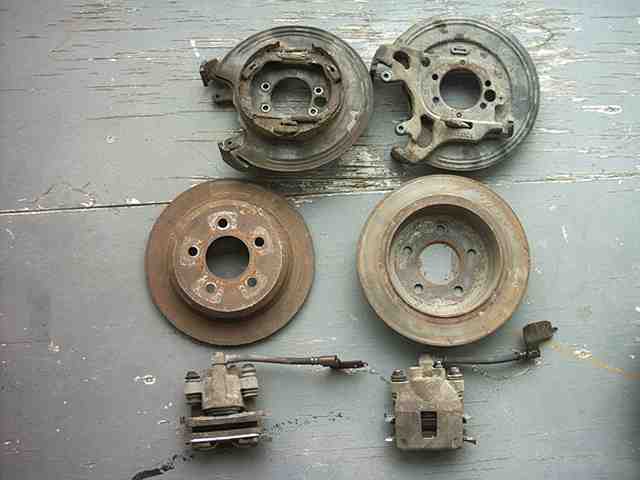
When you pull the parts off take the Calipers, discs, and backing plate and the rubber line on the caliper. Even if the calipers are junk you can use them for a core fee at the local auto parts store and the disc may be turned as well.
Buy all of your parts a head of time to make it easier, this whole job took me about two hours.
Before you begin, here is a list of parts you will need to buy before you upgrade to rear disc brakes.
1. �” 12 Point Wrench
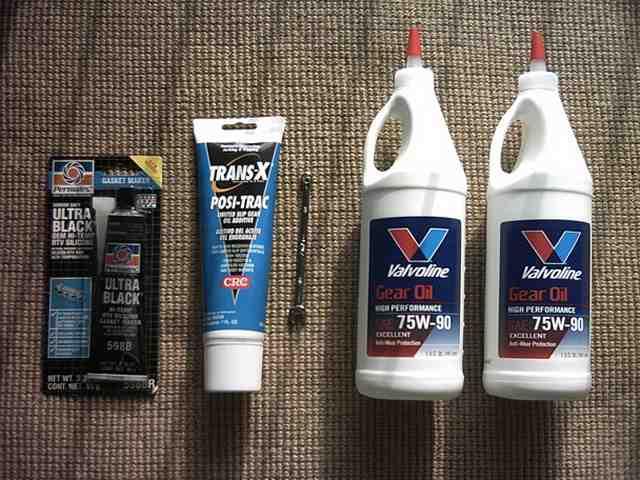
2. 2 Quarts of 75W-90W GL-5 Differential fluid. (find your factory specifications)
3. Mopar Limited Slip Differential Friction Modifier. (if you have a limited slip differential)
4. Differential Gasket and Gasket maker.
5. DOT 3 Brake fluid or better.
6. 3/8″ Brake Line Wrench.
7. WD-40
8. A good set of tools.
Now after removing the drum brake and all of its junk, it’s time to remove the rear axle shafts. This was not as scary as I thought but rather easy.
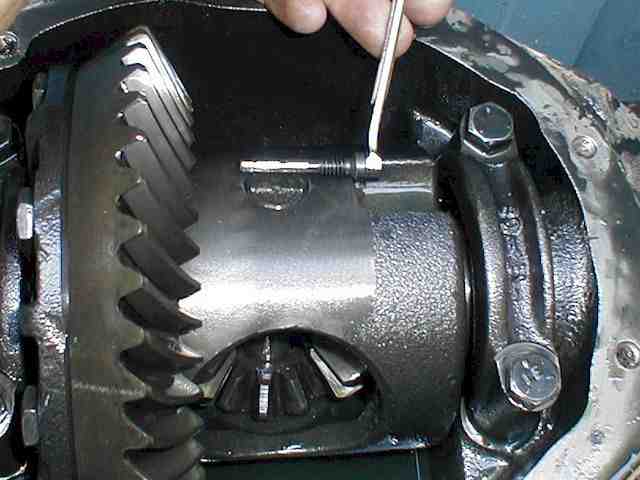
Remove the differential cover (1/2 in. Socket) and drain all of the fluid. Remove the � 12-point lock bolt that holds the axles and C-Clips in place.
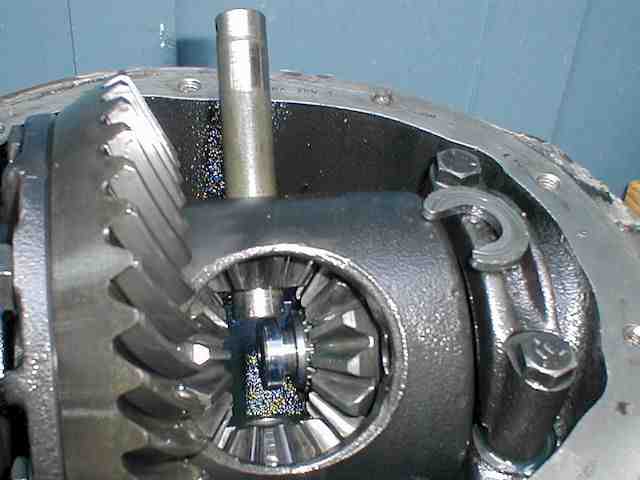
Remove the pinion shaft out of the differential (Do Not turn the axle shafts or drive shaft while the lock bolt is out, your spider gears may fall out.) Push in your axles and the C-Clips will fall out and now you can pull the axles out of the housing.
Now your ready to remove the factory drum backing plate, I sprayed down the backing plate bolts with some WD-40 before I started to loosen things up.
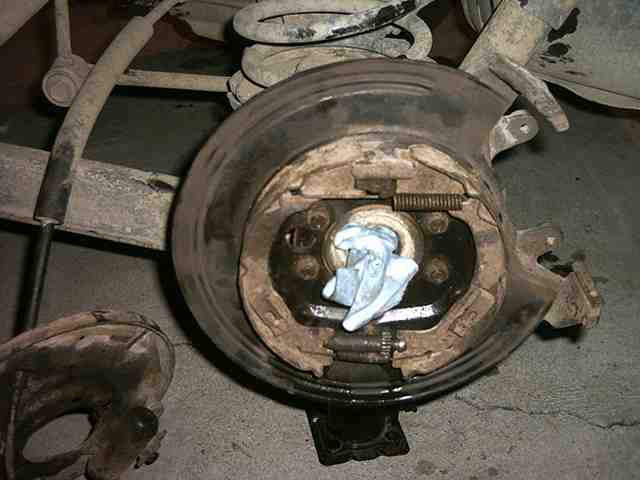
When you install the new backing plate be aware of it correct side. Your emergency brake cable will only fit one way but it fits perfect. Use the factory retainer tangs to secure the emergency brake cable in the disc backing plate. You will have to modify how the end of the cable attaches to the pull lever.
At this time you can place your axles back into the housing and be careful not to damage the axle seals. Slide the axle all the way so you can replace the C-Clips and then pull them back into place. Install the pinion shaft and secure the lock bolt to factory torque specifications.
Scrape the differential cover and differential to remove all of the old seal. Replace the gasket and bolt it back up. I began to pour my axle fluid back into the diff and when the container was almost empty I poured in the friction modifier so I didn�t get to full and couldn�t pour it in at all.
Put in the plug and your done with the differential.
You’re almost done!
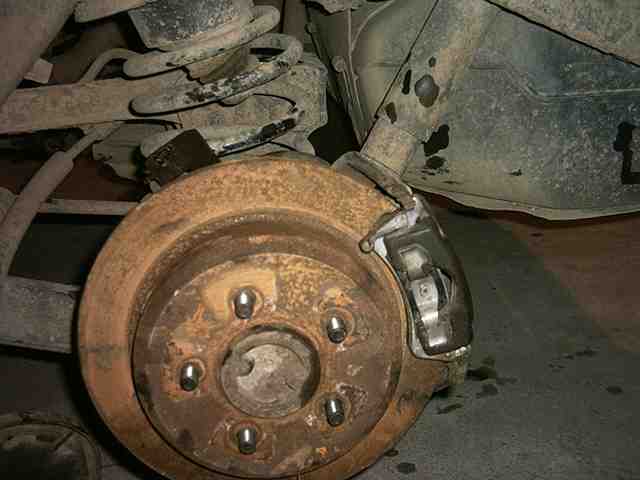
Slide that disc on and bolt the caliper up to the backing plate. Give it one last check and make sure all bolts are in place and snug.
Bleed your brakes and install your tires and give it a test drive.
I noticed it immediately how the brakes responded. No more drum brake adjustment or wandering if they are working properly.