When I first got my TJ, way back when….and I hadn’t yet started crawling around on big rocks, I installed quite a bit of the ham radio equipment that I had been running in my ’89 XJ. Here are some photos and comments regarding what I was using back then. They were previously posted on the QSL.net website but I’ve since moved them here. While Jeep HF/weak signal mobile installations are always a compromise (noisy RF operating environment, small antennas, road/wind noise, etc.), my gear worked pretty well while mobile and quite good once I was parked out in the middle of nowhere.
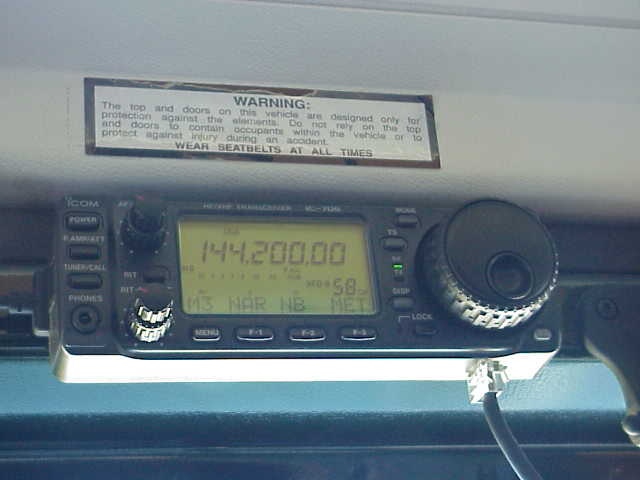
One of the radios I installed was the Icom 706, a HF/VHF transceiver that I used for HF SSB and 2 meter SSB work. The 706’s control head fits very nicely between the two sun visors. Gee, you almost would think that Jeep was thinking ahead on this one. I really liked the control panel in this location, mainly because the sun does not shine directly on it and so no glare or washout. I routed the separation cable to the left and down the driver’s side of the dash (actually, it can go behind the dash while going from top to bottom) and then along the lower door area to the radio which was located behind the driver’s seat (more on that coming up). The external speaker was attached to the roll bar and was located just over my left shoulder. This provided plenty of volume since it is only about 8″ from my ear.
I thought seriously about mounting the front panel just a bit higher, on the leading edge of the roof, right where the WARNING sticker is. However, I knew that if I did that, when I needed to take the hardtop roof off, it would be a hassle trying to then do something with the control panel. So, it got attached to the windshield frame which leaves the top free for an easier removal.
The main body of the radio was mounted on a small wooden shelf (it hung from beneath the shelf via the mobile mounting bracket). The shelf was made from 3/4″ plywood and was held about 4 inches off the floor by a coupler of pieces of 2×4. The end result was a little platform that you can stand on which sat on the floor behind the driver’s seat with the 706 radio snuggled under it for maximum protection. I had originally built this and had it (with a 100W 2 meter amp along side) in the rear floor board of my Cherokee. With a hand full of kids often times occupying the rear seat area, this was a pretty much bullet-proof method of keeping the radio safe and sound. Since I had removed the rear seat in the Wrangler, there was little chance of someone stepping on the radio any more. However, with the possible shifting of things that get tossed into the rear of the Wrangler, I thought it would be good insurance to protect the radio from an accidental mishap.
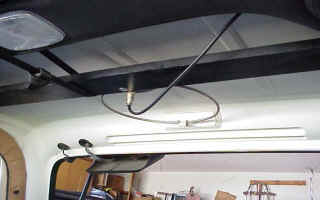
I went about 6 months with my Wrangler before I decided to put a 2 meter horizontal loop in it. Part of the reason I waited that long was the garage was just too darn hot during the summer to work on this project. The loop is mounted to a 1″x4″ pine board which is painted black. It is cut to length (and shaped on the ends) so that it just fits on top of the roll bar. The hardtop curves down around the roll bar making the antenna bracket a snug fit. This keeps it from moving vertically. So that it does not slide backwards, I took a 1″ nylon strap and secured it to the Sound Bar which is mounted just forward of the antenna bracket. This picture is taken looking back from the driver’s seat. I used a 100 watt amp to feed it which did a pretty good job. I worked 2 meter weak signal SSB from a few mountain tops and had pretty good results. It worked very well when the other station was using a beam which was pointed my direction.
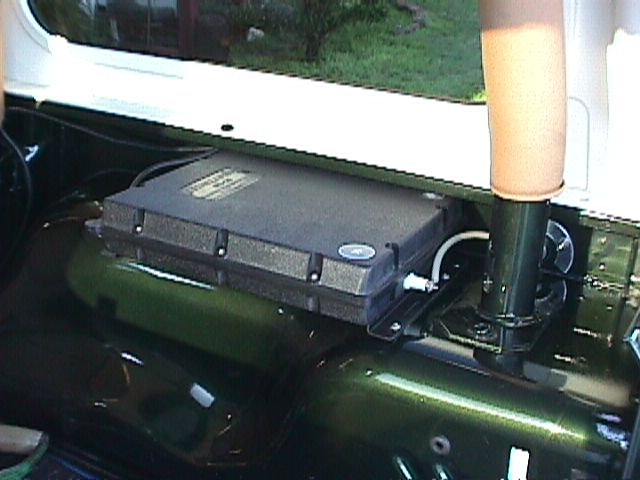
Here is a pic of the SG-230 antenna tuner I used when I was working the HF bands. With a 102″ CB whip as the antenna, I would work down to 40 meters albeit it wasn’t all that great. It would load up pretty well but it was one heck of a compromise in regards to the antenna. 10 meter SSB worked just fine. I used the center conductor from a section of RG-214 coax for the insulated wire that feeds the ball mount (mostly hidden behind the roll bar). The book says that very high RF voltages can exist at this point so make sure no one gets near this when you are transmitting.
As previously mentioned, I used a full length CB whip antenna attached to the SG-230. A lot of the sheet metal in vehicles will flex too much to handle this Hustler stainless steel mount topped with a 102″ whip. By carefully selecting the mounting location for the mount, I used the edge of the body panel to strengthen the upper portion of the mount. Two of the mounting bolts were positioned above the point where the body panel is welded to the fender well. The 3rd mounting bolt was drilled below the weld line, which put the entire mount over this very strong seam. There was virtually NO flexing on this mount.
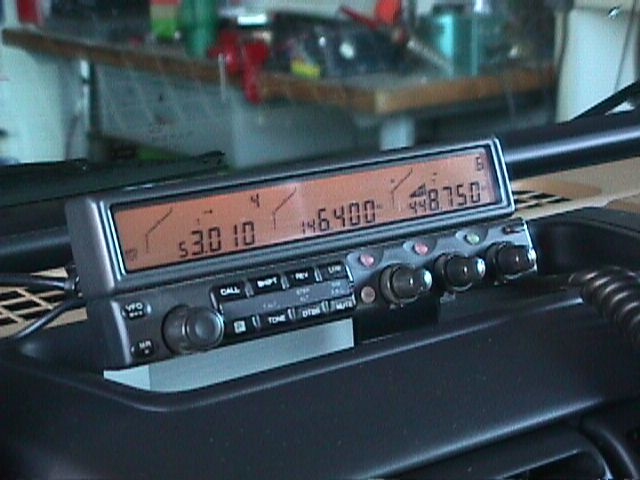
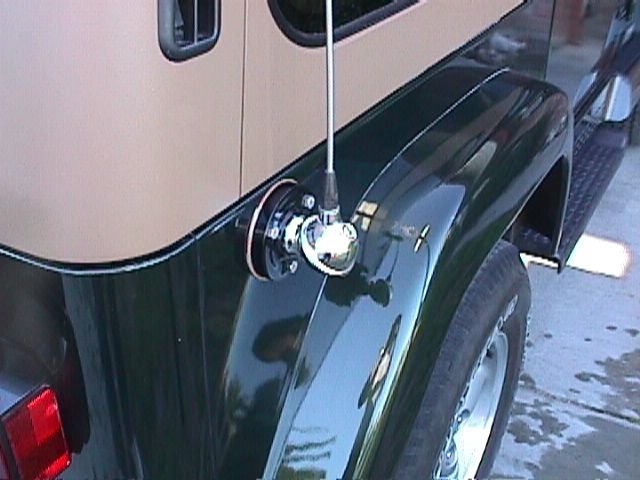
The last radio I ran, way back then, was a Kenwood TM-742 3-band FM rig. The microphone extension cable connector is tucked in behind the front panel. I almost did not install it this way since the main radio was mounted in the mobile bracket which was bolted to the floor, under the driver’s seat. When the mic was attached to the radio itself, the driver had no problem with it, but stretching it over to the passenger’s area was a bit troublesome, especially if you needed to shift gears, etc. So, I went ahead and put the mic connection up on the dash, making the mic easily accessible from either front seat. The cables were routed off to the driver’s side and dropped down behind the dash and followed the same path as did the IC-706 cable. The 742 cable popped out from beneath the carpet right at the front of the driver’s seat mount and attached to the main radio. I used an antenna mount that I put on the driver’s side front fender, which is still in use on another VHF/UHF FM radio.